

Natural light is one of the few upgrades that changes how a house feels without changing its footprint, and demand for skylights Peel Region homeowners can actually rely on has grown steadily as the area’s housing stock ages. Mississauga, Brampton and Caledon cover an unusually wide range of construction eras, from modest postwar bungalows with shallow attics to 1990s two-storey subdivisions with engineered truss roofs and newer estate builds with vaulted great rooms. Each of those roof structures behaves differently once you cut an opening in it, which is why a skylight quote that works for one street can be wrong for the house three blocks over.
This guide covers what skylights Peel Region houses realistically support, what installation and replacement cost in 2026, how Ontario Building Code requirements apply to overhead glazing, and how to tell a repair from a full unit replacement. The numbers below are ranges rather than fixed prices, because the roof deck, the ceiling depth, the shaft length and the access conditions move the final figure more than the skylight itself does.

Skylights Peel Region Homeowners Install: How Local Housing Types Change the Job
Peel Region’s building history splits into a few broad groups, and the group a house belongs to predicts most of the installation scope before anyone climbs a ladder. Older bungalows and side-splits from the 1950s through the 1970s tend to have conventional rafter roofs framed in dimensional lumber, generous attic space and plaster or early drywall ceilings. Heading off a rafter is usually straightforward on these homes, but the attic depth means a light shaft has to be framed and finished, which adds days and cost to the project.
Subdivision housing from the late 1980s onward is dominated by prefabricated roof trusses. Truss webs cannot be cut or altered without an engineered repair detail, so the skylight has to fit between existing members or the layout has to be reworked around them. In practice this caps the width of many units at roughly 550 to 780 millimetres between truss centres, which is why so many skylights Peel Region contractors install in newer subdivisions are narrow and tall rather than square.
Estate and custom homes in Caledon and north Brampton often have vaulted or cathedral ceilings where the rafter is the ceiling, so there is no shaft at all. These are the fastest installations and usually the best-performing, because the glass sits directly over the living space with no light lost to a long shaft. Finally, additions and rear extensions across the region frequently carry low-slope or flat roof sections, which need curb-mounted units and a completely different flashing approach than a shingled slope.
If you are comparing options for your own house, our overview of skylight installation and repair services across Peel Region outlines what we handle in Mississauga, Brampton and Caledon, and our detail page on professional skylight installation explains how a new opening is framed, flashed and finished from the roof down.
Choosing a Skylight Type for a Peel Region Roof
The skylights Peel Region homeowners choose fall into four practical categories: fixed, manual venting, powered venting, and tubular daylighting devices commonly called sun tunnels. Flat roof units form a fifth category defined by mounting method rather than operation. The right choice depends on the room, the roof slope and whether you need ventilation or only daylight.
Fixed units are sealed and do not open. They are the least expensive, the least likely to develop problems over a long service life and the usual choice for stairwells, hallways and rooms that already have adequate ventilation. A fixed skylight is also the simplest unit to size around truss spacing, which is why fixed glass accounts for a large share of the skylights Peel Region subdivision homes end up with.
Venting units matter most in bathrooms and kitchens, where moisture needs a path out of the room. Manual crank units work well when the glass is within reach of a control pole. Above roughly 3.5 metres of ceiling height, most homeowners move to a solar-powered fresh air skylight with a rain sensor that closes the unit automatically, which also avoids running new wiring through a finished ceiling.
Sun tunnels are the practical answer for interior spaces with no exterior wall and no direct roof line above them, such as an interior bathroom, a walk-in closet or a windowless hallway in a two-storey subdivision home. A sun tunnel skylight delivers useful daylight through a reflective tube without framing a full shaft, and it can often be installed in a single day. Tubes are also the least disruptive of the skylights Peel Region bungalow owners can retrofit, because nothing structural changes.
For additions, garage conversions and rear extensions with low-slope roofing, flat roof skylights mount on a raised curb so water drains away from the glazing perimeter instead of pooling against it. This is the single most important detail on a low-slope installation, and it is where most failed flat roof units went wrong in the first place. Curb height is the detail to check on any quote for skylights Peel Region additions and extensions require.
| Skylight Type | Best Suited To | Installed Cost Range (2026) | Typical Install Time |
|---|---|---|---|
| Fixed deck-mounted | Stairwells, hallways, bedrooms, living rooms | $1,800 to $3,200 per unit | 1 day plus shaft finishing |
| Manual venting | Reachable ceilings, small bathrooms | $2,400 to $3,900 per unit | 1 day plus shaft finishing |
| Electric venting | High ceilings with attic wiring access | $3,200 to $5,200 per unit | 1 to 2 days |
| Solar-powered venting | Vaulted ceilings, bathrooms, kitchens | $3,400 to $5,600 per unit | 1 to 2 days |
| Sun tunnel | Interior baths, closets, hallways | $1,200 to $2,400 per unit | Half day to 1 day |
| Flat roof curb-mounted | Additions, extensions, low-slope sections | $2,600 to $6,500 per unit | 1 to 2 days |
What Skylights Cost in Peel Region in 2026
Quoted prices for skylights Peel Region homeowners receive usually bundle four separate cost centres: the unit itself, the roof work, the interior framing and finishing, and access or staging. When two quotes differ sharply, the gap is almost always in the interior finishing scope, or in whether flashing is included as a proper factory kit rather than site-formed metal and sealant.
A few cost drivers are worth understanding before you compare estimates. Shaft length is the biggest one. A bungalow with a deep attic may need a 1.5 to 2.5 metre framed shaft with insulation, vapour barrier, drywall, corner bead, primer and paint, and that work alone can approach the cost of the skylight. Roof pitch matters next, because steep roofs above roughly 8:12 require additional fall protection and slow the crew down considerably.
Glazing upgrades to laminated glass with a low-emissivity coating and argon fill add several hundred dollars per unit, but they materially improve comfort in July and reduce condensation risk in January. On a south-facing room, that upgrade is usually the best value on the entire quote, and it is the option we recommend most often on skylights Peel Region homeowners plan to keep long term.
Multiple units on the same roof are meaningfully cheaper per opening than a single unit, because setup, staging and material handling are shared. Two skylights installed together on the same slope typically cost 15 to 25 percent less per unit than one installed on its own. If you are considering a second opening at some point, pricing both at once is worth doing, since pairing is the cheapest way to add skylights Peel Region homes can support on the same slope.
| Cost Component | What It Covers | Typical 2026 Range | Notes |
|---|---|---|---|
| Skylight unit | Frame, glazing, factory flashing kit | $650 to $2,600 | Varies by size, operation and glass package |
| Roof opening and flashing | Cut, frame, install, step and head flashing, shingle tie-in | $700 to $1,600 | Higher on steep or multi-layer roofs |
| Light shaft framing | Studs, insulation, vapour barrier, drywall | $600 to $1,800 | Not required on vaulted ceilings |
| Finishing and paint | Taping, sanding, primer, two coats | $350 to $900 | Often quoted as a separate line |
| Blinds and accessories | Manual or solar blinds, rain sensors | $350 to $1,100 | Solar blinds cost more but avoid wiring |
| Permit and engineering | Building permit, truss repair detail if needed | $300 to $1,200 | Depends on municipality and structural scope |
How a Skylight Installation Actually Runs
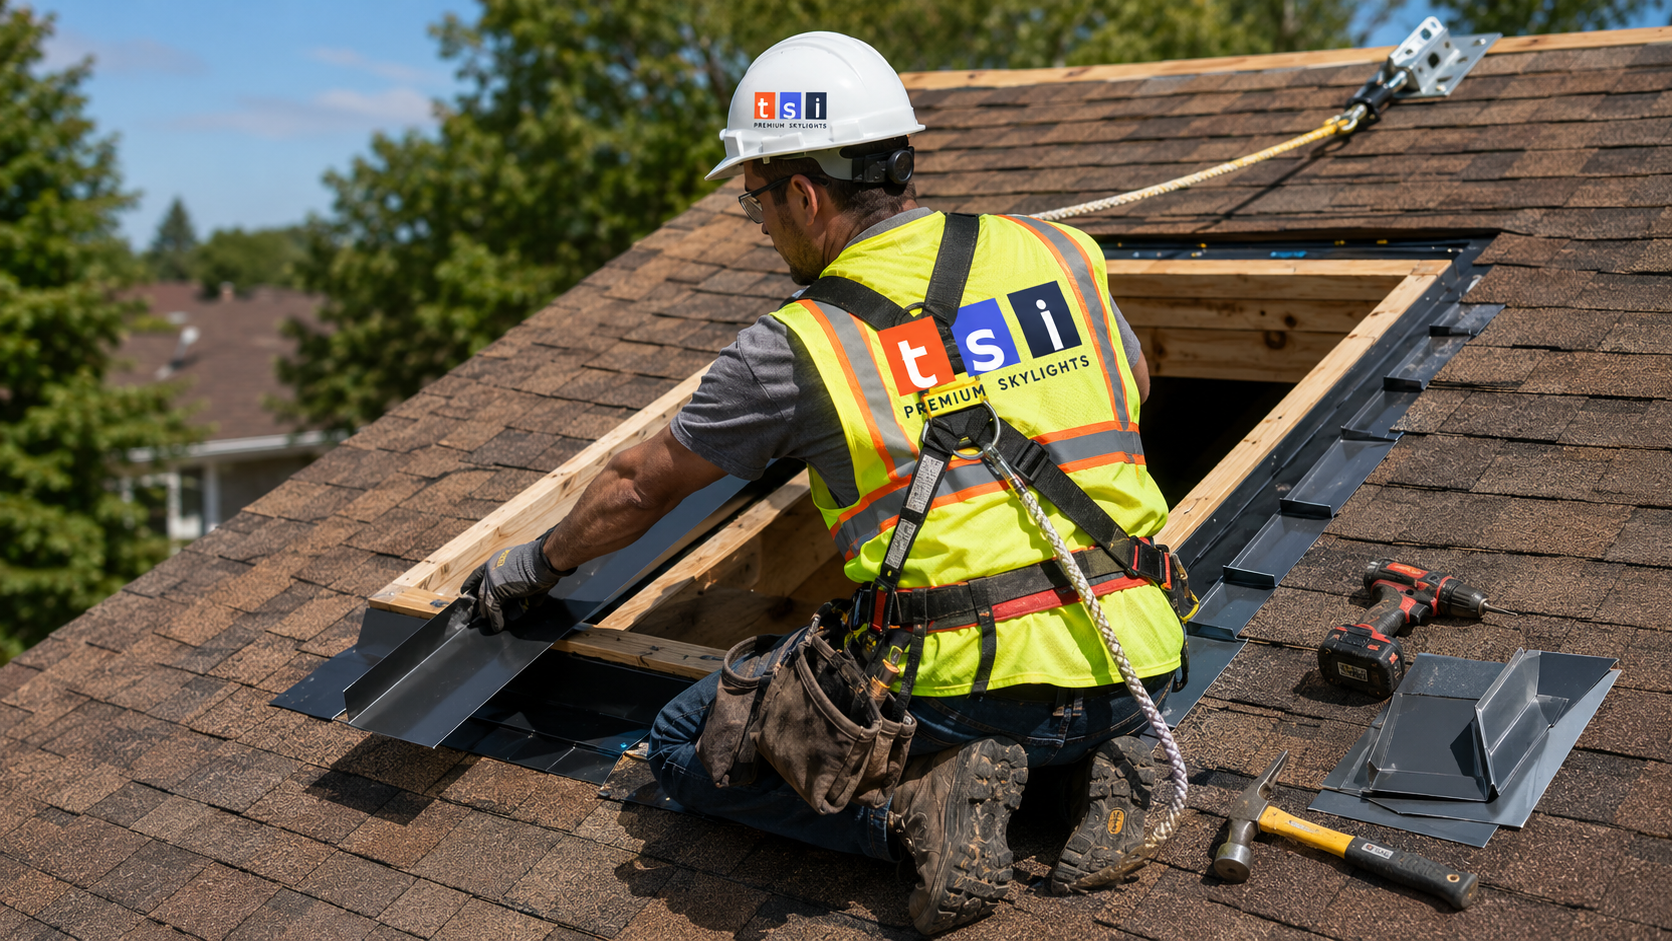
A properly sequenced installation starts inside, not outside. The crew confirms the ceiling location, checks for wiring, ductwork and plumbing stacks in the joist or truss bay, and only then transfers the opening location up to the roof. On the roof, shingles are removed well past the future flashing footprint, the deck is cut, the header and trimmer framing is installed, and the unit is set into place and fastened to the manufacturer’s schedule.
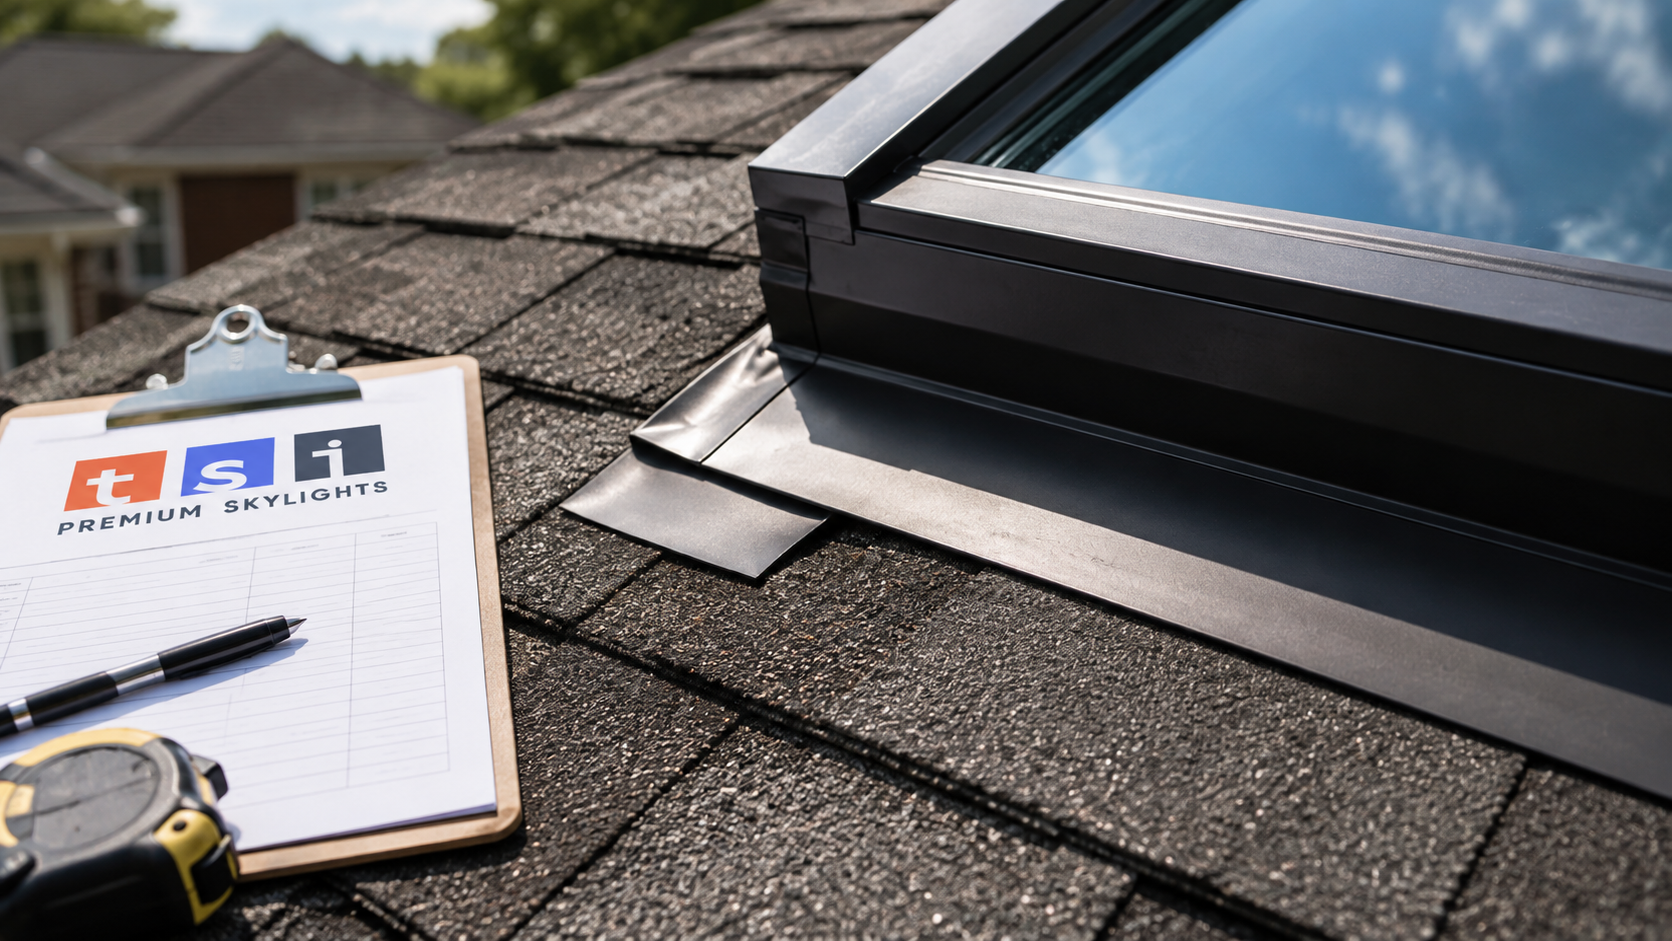
Flashing is the step that determines whether the skylight lasts twenty years or leaks in three. A factory flashing kit matched to both the unit and the roofing material is not optional. Sealant is a secondary defence, never the primary one. Water should be shed by overlapping metal and shingle courses in the correct order, so that anything reaching the flashing is directed back onto the roof surface below the unit and away from the opening.
Inside, the shaft is framed, insulated to current standards, sealed with a continuous vapour barrier and drywalled. Splaying the shaft, meaning angling the walls outward toward the room, spreads noticeably more light than a straight vertical box and is worth requesting wherever framing allows it. Finishing, sanding and painting typically follow a day later, once the compound has cured properly.
For a single unit on a vaulted ceiling, expect one working day. For a bungalow with a long shaft, expect two to four days across two visits, with the roof made watertight at the end of day one regardless of interior progress. Crews scheduling skylights Peel Region wide generally plan roof work for the morning and interior work in the afternoon, which keeps the opening exposed for the shortest possible time.
Repair or Replace: Reading the Symptoms Correctly
Not every water stain means a failed skylight. On the houses we inspect, a large share of reported leaks turn out to be condensation, flashing failure or an unrelated roof problem draining toward the curb. Diagnosing before quoting saves homeowners a great deal of money, and it is the main reason we recommend an inspection before committing to replacement. Many of the skylights Peel Region homeowners assume are finished turn out to be serviceable.
Condensation shows up as even moisture along the lower edge of the glass or on the shaft walls, usually in cold weather and usually in bathrooms and kitchens. It points to humidity and ventilation, not a breach in the assembly. A genuine leak is typically intermittent, follows wind-driven rain and leaves staining that starts at one corner rather than uniformly across the frame.
Fogging or a milky haze trapped between the panes means the insulated glass unit seal has failed. That cannot be repaired, only replaced, and on a unit older than roughly eighteen years it is normally more sensible to replace the whole skylight than to source a discontinued glass pack. Cracked or brittle acrylic domes, common on units installed before the mid-1990s, fall into the same category, and they account for a steady share of the skylights Peel Region homeowners replace each year.
Where the glass and frame are sound but flashing has corroded or was never installed correctly, targeted skylight repair work is usually the better value. When the unit is at end of life, or you are already reroofing, a like-for-like skylight replacement carried out while the shingles are open is the least expensive time to do it.
| Symptom | Likely Cause | Repair or Replace | Typical 2026 Cost |
|---|---|---|---|
| Even moisture on lower glass edge in winter | Interior humidity and condensation | Ventilation correction, no unit work | $0 to $450 |
| Staining at one corner after wind-driven rain | Flashing or shingle tie-in failure | Repair | $450 to $1,200 |
| Haze or fog trapped between panes | Failed insulated glass seal | Replace unit | $1,600 to $3,400 |
| Cracked or yellowed acrylic dome | Age and ultraviolet degradation | Replace unit | $1,700 to $3,600 |
| Venting unit will not open or close | Motor, control or chain failure | Repair, parts permitting | $400 to $1,100 |
| Sagging or soft drywall in the shaft | Long-term leak with concealed damage | Replace unit and rebuild shaft | $2,400 to $5,500 |
Permits, Ontario Building Code and Structural Rules
Skylight work in Ontario is governed by the Ontario Building Code, and the parts that matter most to a homeowner are structural alteration, overhead glazing and insulation continuity. Cutting and heading off a rafter, or altering an engineered truss, is a structural alteration, and municipalities in Peel Region generally require a building permit for it. Fitting a unit entirely between existing structural members without cutting anything is treated differently, so the permit answer depends on the specific roof rather than on a general rule. In practice, most skylights Peel Region homeowners add to a conventional rafter roof will involve a permit application.
Overhead glazing carries its own requirement. Glass installed above an occupied space must be safety glazing, which in practice means a laminated inner pane, so that a failure does not release shards into the room below. Reputable manufacturers supply residential skylights with laminated inner glass as standard, but it is worth confirming on any quote, particularly on low-cost imported units sold online.
Insulation and air sealing form the third area. A skylight shaft is part of the building envelope, and it has to be insulated and air sealed to the same standard as the surrounding ceiling. Shafts that were framed but never properly sealed are one of the most common causes of persistent winter condensation, and they are common on older bungalow retrofits done by general handypeople rather than by skylight specialists.
Finally, attic ventilation has to be maintained around the new opening. A skylight shaft blocks part of the airflow path from the soffit to the ridge, and the framing needs to preserve a clear ventilation channel on either side. Skipping this shortens shingle life and encourages ice damming above the unit, which then gets misdiagnosed as a skylight leak the following spring.
How Skylights Perform Through a Peel Region Year
The GTA climate puts skylights Peel Region homes carry through a wide annual swing, from humid summer afternoons above 30 degrees to sustained subzero stretches with repeated freeze and thaw cycling. The glazing package is what determines how comfortable the room stays. A double-glazed unit with a low-emissivity coating and argon fill rejects a large share of summer solar heat while keeping the interior glass surface warm enough in winter to limit condensation.
Orientation matters more than most homeowners expect. South and west-facing units deliver the most light and the most unwanted summer heat, and they benefit most from a blind or a heat-control glass option. North-facing units give even, glare-free daylight all day with minimal heat gain, which is often the better choice for a home office or a studio. East-facing units brighten mornings and cool off by afternoon, which suits kitchens well. Orientation should be settled before sizing, because it drives the glass package on most skylights Peel Region homeowners install.
For homes across the region, adding solar or manual blinds is the simplest way to make a south-facing unit comfortable year round. Room-darkening blinds are worth the upgrade in bedrooms, where a summer sunrise before 6 a.m. otherwise becomes a nuisance. In bathrooms, a venting unit paired with the existing exhaust fan does more for moisture control than any glazing upgrade on its own.
Hiring the Right Installer for Skylights Peel Region Homes Need
Skylight work sits at the intersection of roofing and interior carpentry, and the failures we are called out to repair almost always trace back to a contractor strong in one trade and weak in the other. A roofer who flashes perfectly but frames a poorly sealed shaft creates a condensation problem. A renovator who builds a beautiful splayed shaft but improvises the flashing creates a leak. Skylights Peel Region homeowners install last longest when one crew owns both halves of the work.
Ask any installer these questions before signing. Which manufacturer flashing kit will you use, and is it matched to my roofing material? Will the shaft be insulated and vapour sealed, and to what value? Is a permit required for my roof structure, and who applies for it? What is the warranty on labour, separately from the manufacturer’s warranty on the unit? Will the roof be left watertight at the end of each working day?
Also confirm workplace safety insurance coverage and liability insurance, and expect a written scope rather than a single lump-sum line. Homeowners planning for skylights Peel Region properties will keep for a decade or more should treat the labour warranty as the most important number on the page, because manufacturer glass warranties are largely standardised while workmanship varies enormously between companies.
Toronto Skylight Installers is based in the Toronto area and serves homeowners throughout Peel Region, as well as neighbouring communities across York Region. Every quote we issue separates the unit, the roof work and the interior finishing, so you can see exactly what you are paying for, and every installation uses a manufacturer flashing kit matched to the roof covering. That approach applies to all skylights Peel Region homeowners ask us to install, repair or replace.
How much do skylights cost in Peel Region in 2026?
Do I need a building permit to install a skylight in Mississauga or Brampton?
Can a skylight be installed in a home with roof trusses?
Why is my skylight dripping in winter if it is not leaking?
How long does a skylight last before it needs replacing?
Should I replace my skylights when I replace my roof?
Book Your Free Assessment for Skylights Peel Region Homeowners Trust
Whether you are adding daylight to a dark hallway, replacing a fogged unit that has reached the end of its service life, or diagnosing a stain that may not be a leak at all, a proper on-site assessment is the fastest route to a realistic number. Toronto Skylight Installers inspects the roof, the attic or shaft and the interior finish before quoting, so the scope you receive reflects your actual roof structure rather than a generic price list.
Call us today at (416) 365-7557 or request a free consultation to have your project reviewed by an installer who works on these roofs every week.
Toronto Skylight Installers proudly serves homeowners across Peel Region, including Mississauga, Brampton and Caledon, along with communities throughout the Greater Toronto Area.