

Skylight Installation Project Toronto
A complete residential skylight installation in a Toronto home, from the first roof assessment to a fully sealed, light-filled finish, delivered in two days with a leak-free VELUX guarantee.
Natural light changes how a home feels more than almost any other upgrade, and in a city like Toronto, where winters are long and grey, a well-placed skylight can turn a dim, closed-in room into the brightest space in the house. This project walks through a complete residential skylight installation we carried out in Toronto, from the initial roof assessment right through to the finished interior.
We’ve documented it in detail because a skylight is only as good as its installation. The difference between a skylight that lights up a home for 25 years and one that leaks within a season comes down to the roof preparation, the flashing sequence, and the interior finishing, the parts most homeowners never see.
It’s a representative example of how Toronto Skylight Installers approaches every new installation across the city and the GTA: methodical, code-compliant, and built to stay watertight through decades of Canadian freeze-thaw cycles.
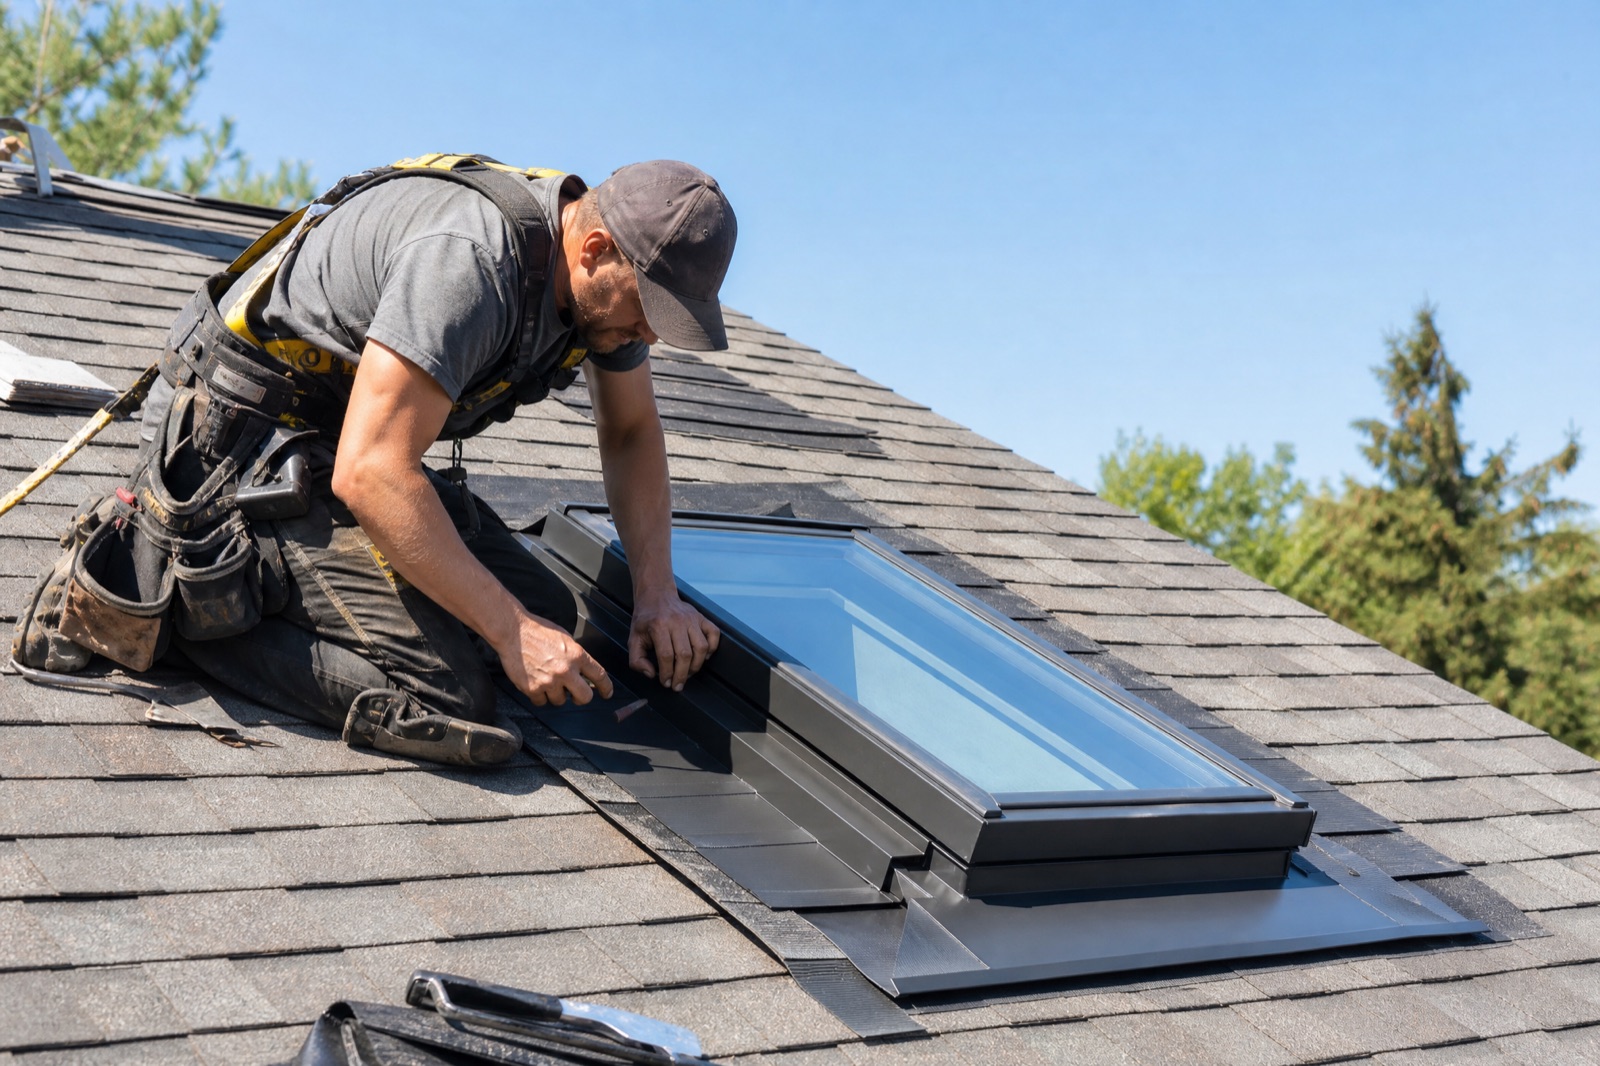
The Challenge
The homeowners had a north-facing living room and a central hallway that stayed dark from morning to night, forcing them to run overhead lights even at noon. The space felt smaller and colder than it should have, and no amount of lamps or lighter paint colours had fixed the fundamental problem: there simply wasn’t enough daylight reaching the middle of the home.
Like most Toronto homeowners considering a skylight, they were also weighing three real concerns, leaks, heat loss through a Canadian winter, and whether their asphalt-shingle roof could take a skylight without structural trouble. They’d heard the horror stories about skylights that drip every spring, and they wanted reassurance that this wouldn’t become one of them.
The Homeowner’s Goals
The primary goal was simple: flood the living space with natural daylight without creating a maintenance headache down the road. They wanted a skylight that would brighten the room dramatically while staying completely watertight and energy-efficient through Toronto’s temperature swings.
Just as important, they wanted the finished result to look intentional, like the skylight had always been part of the home’s architecture. That meant a cleanly framed and drywalled interior light shaft with crisp corners and even light spread, not a patched-looking hole in the ceiling.
Our Solution
After assessing the roof and attic, we specified a VELUX deck-mounted fixed skylight with Low-E3 glazing, a unit rated specifically for Canadian climates, paired with a full VELUX factory flashing kit matched to the asphalt-shingle roof. Deck-mounted units with factory flashing are the single most reliable defence against leaks, which is why we fit them as standard on Toronto homes rather than cheaper curb-mounted alternatives.
To get the most daylight out of the opening, we planned the interior shaft to splay outward as it descended into the room, spreading light deeper across the living space than a straight shaft would. Every detail, from unit placement between the rafters to the direction of the splay, was chosen to maximise brightness while protecting the roof structure.
Our Step-by-Step Approach
1. Assessment & Planning
Every installation begins on the roof and in the attic, long before any cutting starts. We measured the rafter spacing, confirmed the roof pitch, and inspected the ceiling cavity for wiring, plumbing, or HVAC runs that would affect where the skylight could go.
We then positioned the skylight to capture the most daylight while keeping the structural cut between rafters wherever possible, the approach that adds the most light with the least disruption to the roof framing.
2. Roof Preparation
With placement confirmed, we removed the shingles around the opening and cut the roof deck precisely to the skylight’s dimensions. Clean, accurate cuts here are what let the flashing seat properly later.
Where a rafter had to be cut to make room, we installed doubled headers to carry the redistributed load, framed to the Ontario Building Code, so the roof structure ends up just as strong as it was before the opening was made.
3. Flashing & Weatherproofing
This is the step that determines whether a skylight leaks or lasts for decades, and it’s where cheaper installers cut corners. We installed the VELUX factory flashing kit in the correct sequence, tucked under the shingles at the top and layered over the shingles at the bottom, so water is always directed over the flashing and down the roof, never behind it.
For Toronto’s freeze-thaw winters, we added an ice-and-water membrane around the curb. That extra layer guards against the ice damming that causes so many skylight leaks in older Canadian homes.
4. Skylight Installation
The skylight was set into the prepared opening, fastened securely to the deck, and sealed. We then re-integrated the surrounding shingles with the new flashing so the roof reads as one continuous, watertight surface.
Before moving a single tool inside, we ran a controlled water test over the completed exterior to confirm the seal was perfect. We never rely on “it should be fine”, we verify it.
5. Interior Finishing
Inside, we framed and drywalled the light shaft, then taped, mudded, sanded, and primed it so it was ready for the homeowner’s choice of paint. This is the finishing work that makes a skylight look built-in rather than bolted-on.
The completed shaft looks like an original architectural feature, clean corners, an even wash of daylight, and no visible seams or patch lines. It’s the kind of detail that separates a professional installation from a weekend job.
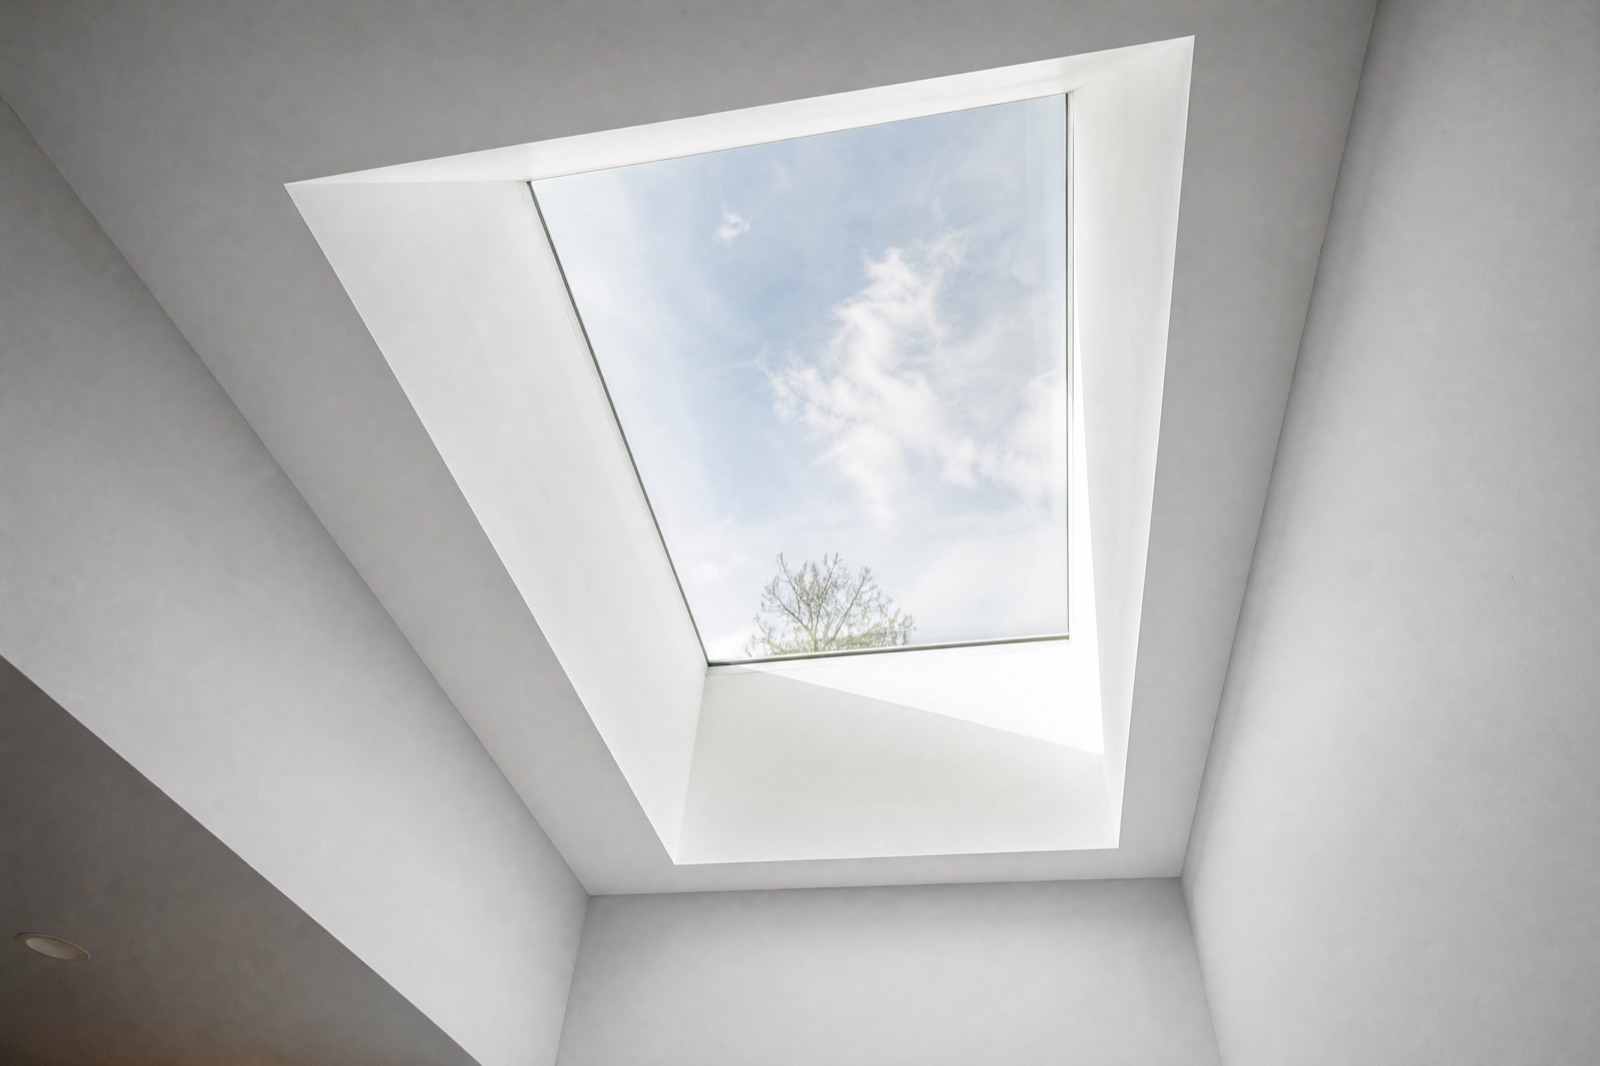
The Result
The living room and hallway now fill with natural daylight from morning through late afternoon, and the homeowners have effectively stopped reaching for the light switch during the day. The room feels larger, warmer, and more welcoming, exactly the transformation they were after.
On the technical side, the installation passed its post-install water test with zero leaks, and the Low-E3 glazing keeps the room comfortable through both summer heat and winter cold. Total time on site was two days, start to finish, with the home left clean and the roof fully warrantied.
Products & Materials
We installed a VELUX deck-mounted fixed skylight with Low-E3 laminated glazing, the glass reflects interior heat back into the room while filtering UV, so furniture and floors are protected and heating bills stay in check. It’s paired with a VELUX EDW factory flashing kit engineered specifically for shingle roofs.
The assembly is completed with ice-and-water shield membrane for freeze-thaw protection and code-compliant framing lumber. Every VELUX component carries the manufacturer’s 10-year installation and glass warranties, backed by our own workmanship guarantee.
Why Toronto Homeowners Trust TSI
Toronto Skylight Installers install skylights every single week across Toronto and the GTA, so we know the roof types, the local building codes, and the specific weather patterns that determine whether a skylight lasts. That volume of experience means we’ve seen, and prevented, the mistakes that lead to leaks.
We fit factory flashing kits as standard, follow the manufacturer’s exact installation sequence, and water-test every job before we finish. It’s why our installations don’t leak, and why homeowners across the city trust us with their roofs and their homes.
Frequently Asked Questions
How long does a skylight installation take in Toronto?
Most residential skylight installations take one to two days. A single fixed skylight with a straightforward interior shaft is often completed in a day, while multiple units, a vented skylight, or a deeper light shaft can extend the job to two.
We confirm the exact timeline during the free assessment, once we’ve seen your roof and ceiling, so you’re never left guessing how long your home will be a worksite.
Will a skylight leak?
A properly installed deck-mounted skylight with a factory flashing kit is extremely reliable, the overwhelming majority of skylight leaks come from improper flashing, not from the skylight itself.
We install the manufacturer’s flashing in the correct over-and-under sequence, add ice-and-water membrane for Toronto winters, and water-test every job before we leave. That’s why our installations stay watertight season after season.
Will a skylight make my home lose heat in winter?
Modern skylights with Low-E3 glazing are rated for Canadian climates and lose very little heat. The Low-E coating reflects interior warmth back into the room while still letting daylight pour in, so you get the light without the draft.
For Toronto homes we specify glazing matched to our winters, so both comfort and energy bills stay in check year-round.
Can you install a skylight on my roof type?
Yes, we install on asphalt shingle, flat, and metal roofs across Toronto, using the correct flashing system for each roof type. During your free assessment we confirm your roof pitch, structure, and the best skylight-and-flashing combination for your specific roof, so the recommendation is tailored to your home rather than a one-size-fits-all guess.
Ready to Start Your Skylight Project?
Thinking about adding natural light to your Toronto home? We’ll assess your roof, recommend the right skylight for your space and budget, and give you a clear, no-pressure quote, completely free of charge. Most installations are booked within a couple of weeks.
Need Help?
- 416-365-7557
- in**@***********************rs.ca
Our Services
- Skylight installation
- Skylight Repairs
- New Skylight Installation
- Emergency Skylight Repairs
- Skylight Replacement
reviews