

Nobody buys a skylight because of the curb, yet the skylight curb is often the part that decides whether a unit stays dry for decades or starts leaking after a few winters. It is the raised box the skylight sits on, and on many older houses it was built on site from ordinary lumber. When that lumber rots, sits too low or stays cold enough to collect condensation, no amount of new glass or fresh sealant will fix the problem.
This guide focuses on the curb itself: how site-built curbs are made, the two main ways they rot, how high a curb should sit for the roof it is on, why insulating it matters, and how a rebuild is sequenced with new flashing so the job is done once.
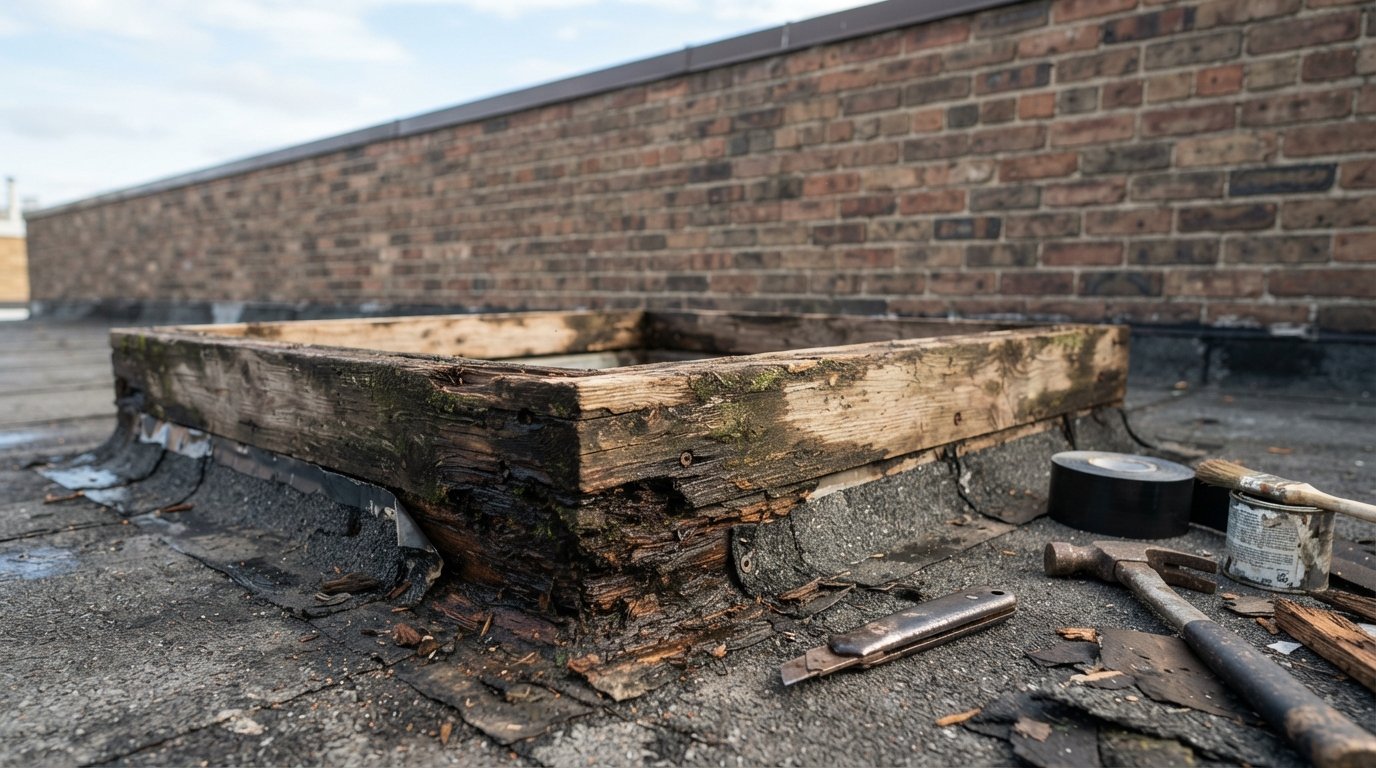
What A Skylight Curb Does And How It Is Built
A skylight curb is a rectangular frame that lifts the skylight above the roof surface. It gives water somewhere to go other than into the joint between skylight and roof, raises the unit above snow and ponding, and provides a flat, square base the skylight can seal against. On flat and low-slope roofs, a curb is essential. On pitched roofs, many modern units are deck-mounted with a factory frame instead, but plenty of older pitched-roof skylights also sit on site-built curbs.
A typical site-built skylight curb is framed from dimensional lumber stood on edge, nailed to the roof deck around the opening and tied into the rafters or headers below. The roofing membrane or underlayment is turned up its sides, metal flashing or a membrane base flashing covers that joint, and the skylight or its counterflashing laps over the top. Factory-made curbs also exist, sometimes insulated, and some curb-mounted skylights are designed around specific curb dimensions from the manufacturer.
Because this post concentrates on curb condition and rebuilding, it does not repeat the general comparison of curb-mounted and deck-mounted skylights. The short version: the mounting type is chosen by roof slope and product, while the condition of the curb decides how much work a repair or replacement involves.
Two Ways A Curb Rots
When we open up a failing skylight curb, the damage almost always traces back to one of two water sources, and sometimes both. Telling them apart matters, because fixing the wrong one means the new curb will rot the same way.
From outside: failed flashing
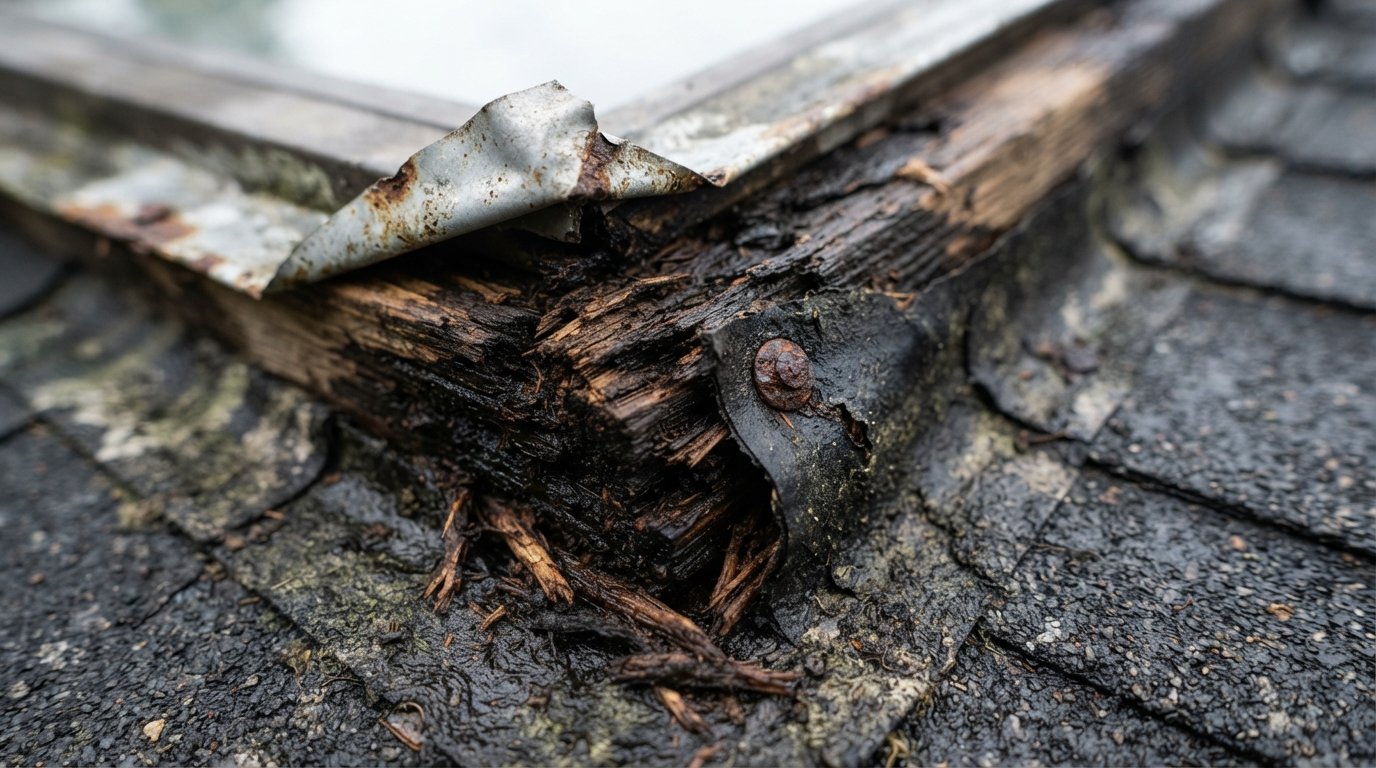
Water that gets past the flashing runs down the outside face of the curb, behind the membrane or metal. Common causes include base flashing that was never carried high enough, membrane that has shrunk and pulled away at the corners, sealant used in place of proper counterflashing, and fasteners driven through the flashing face. Rot from outside usually starts at the bottom corners, especially the uphill side on a sloped roof where water and debris collect, and spreads upward and inward.
From inside: condensation
The inside face of a skylight curb faces the warm room air, while the outside faces cold weather. If the curb is uninsulated and the shaft lacks a proper vapour barrier, warm humid air reaches the cold wood and moisture condenses on or in it. Over many winters this soaks the upper inside edge of the curb, where it meets the skylight frame, and water drips down into the shaft. Condensation rot tends to show up as dark, soft wood along the inside top edge and staining at the top of the shaft walls rather than at a single corner.
| Where the damage is | Likely source | What to fix besides the wood |
|---|---|---|
| Bottom outside corners, uphill side worst | Flashing failure or water backing up above the curb | New base flashing, correct laps, possibly a diverter above |
| Inside top edge, all around | Condensation on a cold, uninsulated curb | Curb and shaft insulation, air sealing, indoor humidity |
| One corner only, outside | Local flashing split or poor corner detail | Corner flashing rebuilt properly |
| Top of curb under skylight frame | Failed skylight gasket or seal | New skylight or new gasket and sealing |
| Deck around the curb soft as well | Long-term leak spreading into the roof deck | Deck section replaced along with the curb |
If you are seeing stains around an older curb-mounted unit, our skylight repairs service starts with finding which of these is driving the damage before anything is torn off.
How High Should A Skylight Curb Be?
Many older curbs are simply too low. A skylight curb that barely clears the roof surface sits in the path of ponding water on flat roofs, gets buried by snow drifts and does not leave enough height to carry the roofing membrane up properly. Height requirements come from two directions: the skylight manufacturer’s installation instructions and the roofing membrane manufacturer’s details for base flashing. Both should be checked for the specific products involved; for more on the numbers, see our notes on flat roof skylight curb heights.
As general guidance, roofing details for low-slope roofs commonly call for base flashing to extend several inches up the curb, with around 8 inches a widely used target, and skylight manufacturers set their own minimum curb heights. On a pitched roof water moves quickly, so modest curb heights are usually acceptable, but snow still collects against the uphill side.
Factors that push toward a taller curb:
- Low slope or flat roof. Water moves slowly and can pond, especially near parapets or where the roof has settled.
- Snow accumulation. Drifting against parapets, walls or higher roof sections can bury a low curb. Ontario winters make this a real consideration.
- Future reroofing. Each new layer of insulation or roofing raises the roof surface. A curb built to the minimum today may be too low after the next roof replacement.
- Location on the roof. A skylight near a drain, valley or scupper sees more water than one near a high point.
Taller curbs have trade-offs: a deeper light well can reduce light spread slightly, and a taller curb has more surface to insulate. On most houses those are minor compared with the benefit of keeping the skylight out of the water and snow.
| Roof situation | Curb height consideration | Other detail to plan |
|---|---|---|
| Flat roof, open area | Enough height for full base flashing per membrane details | Slope the roof surface so water drains away from the curb |
| Flat roof near a parapet or wall | Extra height for drifting snow | Check drift patterns after past storms |
| Low-slope roof, curb near a drain | Extra height to clear standing water | Consider relocating if the opening is being reframed |
| Pitched shingle roof, site-built curb | Moderate height usually sufficient | Diverter or cricket above wider curbs |
| Roof planned for added insulation later | Build tall enough for the future roof surface | Coordinate with the roofer’s planned build-up |
Insulating The Curb
An uninsulated skylight curb is a cold rectangle in an otherwise insulated roof. In winter its inner face drops toward outdoor temperature, and that is where condensation forms. Insulating the curb is one of the most effective ways to stop the drip that homeowners often mistake for a leak.
There are a few ways to do it:
- Rigid insulation on the outside face of the curb, under the membrane or flashing. This keeps the wood itself warmer and drier, and it is usually the best option during a rebuild.
- Insulated factory curbs that come with foam built in, used with some curb-mounted skylight systems.
- Shaft insulation and air sealing below, a topic covered on its own elsewhere.
Insulation alone is not the whole answer: the shaft also needs a continuous air and vapour barrier, and a bathroom with a weak exhaust fan will challenge any curb.
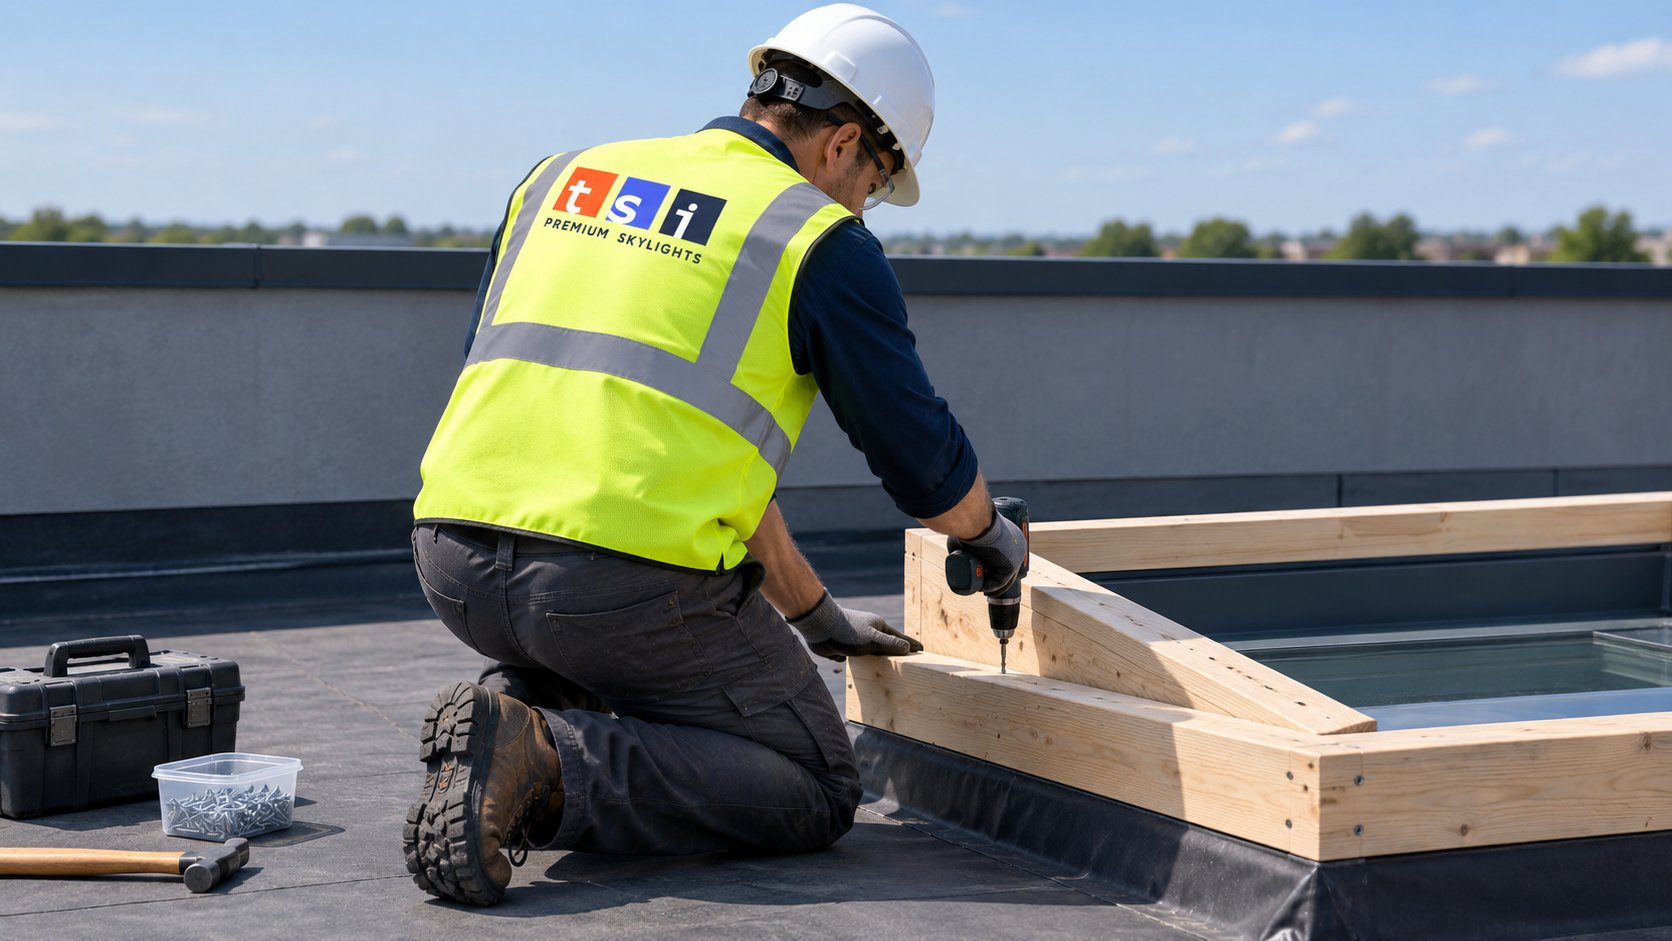
Repair Or Rebuild?
Small, surface-level damage on an otherwise solid skylight curb can sometimes be cut out and patched with new lumber. In practice, though, a curb that shows rot on the outside usually has more damage hidden under the flashing. Once the skylight is off and the flashing is peeled back, it often makes more sense to replace the whole curb than to splice new wood into old.
A rebuild is usually the right call when:
- Rot extends along more than a short section of any side.
- The curb is too low for the roof it sits on.
- The curb is out of square enough to prevent a good seal.
- The skylight is being replaced anyway, so the curb will be fully exposed.
- The roof deck around the curb is also soft.
| Finding | Patch may work | Rebuild is usually better |
|---|---|---|
| Extent of rot | A short, isolated section | Rot along a full side or at several corners |
| Curb height | Meets current product and membrane details | Too low for base flashing or snow |
| Shape | Square and level | Twisted, settled or out of square |
| Skylight plans | Existing unit is fairly new and staying | Unit is being replaced anyway |
| Roof deck | Firm around the opening | Soft or delaminated sheathing nearby |
| Insulation | Can be added from the shaft side | Needs rigid insulation on the outside faces |
Patching may be reasonable when the damage is minor, clearly local, the curb height is adequate, and the skylight and flashing are both relatively new. That is less common than it sounds.
How A Curb Rebuild Is Sequenced With New Flashing
The order of work matters, because every layer has to lap over the one below it. A typical skylight curb rebuild on a low-slope roof looks like this:
- Protect inside. The floor below is covered, and the shaft is protected from falling debris.
- Remove the skylight. The unit is unfastened and lifted off. If it is being reused, it is set aside safely; often a new unit is planned.
- Cut back the roofing. Membrane and flashing are cut back far enough around the curb to expose sound roofing and clean deck.
- Remove the old curb and inspect the deck. Rotted deck boards or sheathing around the opening are replaced, and the framing below is checked.
- Frame the new curb. New lumber is cut to the size the skylight needs, set square, fastened to the deck and structure, and built to the planned height. Fasteners and any treated lumber must be compatible with the flashing metals used.
- Insulate. Rigid insulation goes on the outside faces, or an insulated curb system is installed.
- Tie in the roofing. New membrane or underlayment is carried up the curb sides and lapped into the existing roof following the membrane manufacturer’s details. Corners get particular attention.
- Install flashing or counterflashing. Metal or membrane flashing is installed so water sheds outward at every joint.
- Set the skylight. The skylight is fastened and sealed to the curb according to the manufacturer’s instructions.
- Finish the shaft. Inside, the shaft is insulated, air sealed and the drywall repaired or replaced.
This is roofing work as much as skylight work. The person doing it needs to understand the membrane on your roof and how to tie into it without creating a weak seam. Early autumn is a good time for it: roofing materials bond well in mild temperatures, and the curb is sealed before the freeze-thaw season. We carry out curb rebuilds across the GTA, including through our Durham Region skylight installation, replacement and repair team.
On cost, curb work varies too much for a single figure. As a broad estimate, rebuilding a curb as part of a skylight replacement often adds somewhere from several hundred dollars to about $1,500, depending on size, roofing type and deck repairs. If a new skylight is included, total project costs commonly run well into the thousands. Treat these as estimates only; a roof inspection is needed for a real price.
What To Ask Before A Curb Rebuild
- What caused the rot: flashing, condensation or both, and how will each be addressed?
- How high will the new skylight curb be, and why is that height right for this roof?
- Will the curb be insulated, and with what?
- How will the new membrane tie into my existing roofing?
- Is the roof deck around the opening being checked and replaced if soft?
- Are you reusing the skylight or installing a new one, and does it fit the new curb dimensions?
- Will the shaft be air sealed and insulated as part of the job?
If a new unit is part of the plan, our flat roof skylights are designed to sit on properly built curbs, and our skylight replacement page explains the wider process.
Skylight Curb Questions
How do I know if my skylight curb is rotten?
Can a rotted curb be repaired without removing the skylight?
Why does condensation rot the inside of a curb?
Should a new curb be taller than the old one?
Does every skylight need a curb?
How long does a curb rebuild take?
Get Your Skylight Curb Assessed
If your skylight drips, stains or looks low on the roof, the curb is worth a close look before you replace anything else. Toronto Skylight Installers will inspect the curb, flashing and shaft together, explain whether the damage comes from outside or inside, and recommend a repair or rebuild that fixes the cause.
Call us today at (416) 365-7557 or request a free estimate.
Serving homeowners in Durham Region and across the wider GTA with skylight installation, replacement and repair.