

Most of our work involves putting skylights in or replacing old ones, so it may seem odd for an installer to write about taking them out. But skylight removal is sometimes the right answer. A renovation moves a wall, a room that used to be a hallway becomes a bedroom that needs darkness, or a roof redesign simply does not have a sensible place for the old opening. When closing up a skylight is done properly, the roof and ceiling look as if the opening was never there. When it is done badly, the patch becomes the leakiest, coldest spot in the house.
This guide explains when removal makes sense, what closing the opening really involves on the roof and inside, what it tends to cost, and when a smaller unit or a sun tunnel would serve you better than a flat ceiling.
When Skylight Removal Is The Right Call
Nobody should remove a working skylight on a whim. Daylight from above is hard to replace, and many owners who close one up later wish they had kept some natural light. That said, there are solid reasons to consider skylight removal:
- A layout change. Walls move during renovations. A skylight that once lit a hallway may end up over a closet, straddling a new partition, or directly above a bed where early-morning light is unwelcome.
- Chronic heat gain. Large, older units on south or west slopes, particularly clear single-layer domes, can overheat a room in warm months. Shades and modern glazing help, but in a small room under a big opening, removal is sometimes simpler.
- A roof redesign. Adding a dormer, changing the roof pitch, installing solar panels or converting to a different roofing system may leave the old opening in the wrong place.
- Repeated leaks in a poor location. A skylight set in a valley, beside a chimney or just below a dormer can fight water flow for its whole life. Sometimes the better fix is to close it and put light somewhere else.
- Structural concerns. Occasionally an opening was cut without proper headers, and correcting the framing is a good time to decide whether to keep the skylight at all.
If the only problem is a leak, fogging or a cracked lens, removal is usually not the best first step. A replacement unit with new flashing solves those issues and keeps the light. It is worth comparing options with someone who does both. Our page on skylight replacement and upgraded units explains what a modern replacement involves, which helps you weigh it against a full skylight removal.
Remove, Replace Or Downsize: Comparing Your Options
Before deciding, look at the three realistic paths side by side. Each solves a different problem, and the right choice depends on why you are unhappy with the current skylight.
| Option | Best when | What you keep or lose | Main trade-off |
|---|---|---|---|
| Full skylight removal | The opening is in the wrong place or the room needs to be dark | Lose daylight completely; gain a continuous roof and ceiling | Roof patch must be carefully matched; interior needs drywall, insulation and paint |
| Replace with a modern unit | The location is fine but the unit leaks, fogs or overheats | Keep daylight with better glazing and new flashing | Does not help if the room layout no longer suits a skylight |
| Downsize to a smaller skylight | The opening is too large for the room | Keep some daylight with less heat gain | Requires reframing part of the opening, so it is closer to a removal in scope |
| Swap for a sun tunnel | The room needs some light but not a large opening or view | Keep diffused daylight through a small roof penetration | No view of the sky; most of the old opening still has to be closed |
| Add shades to the existing unit | Glare or heat is the only complaint | Keep everything, control light when needed | Does nothing for leaks or poor placement |
Downsizing and sun tunnels are often overlooked. If a room is overheating from a large skylight, a smaller unit with better glass may give you the light you want without the heat. And a sun tunnel skylight needs only a small round roof opening, so a hallway or bathroom can stay bright even after most of the old opening is closed.
What Closing The Opening Involves On The Roof
Skylight removal is really a small roofing and framing project. The work is the reverse of an installation, but the finish standard is higher, because a patch has to blend with a roof that has aged for years.
Removing the unit and curb
The crew starts by removing shingles around the skylight, then the flashing, then the unit itself. On curb-mounted skylights, the wooden curb comes out too. Once the opening is bare, the framing is inspected. Any rot in the rafters, headers or sheathing edges is cut out and replaced. Water that got past failing flashing over the years often shows up here, as dark staining or soft wood.
Framing the infill
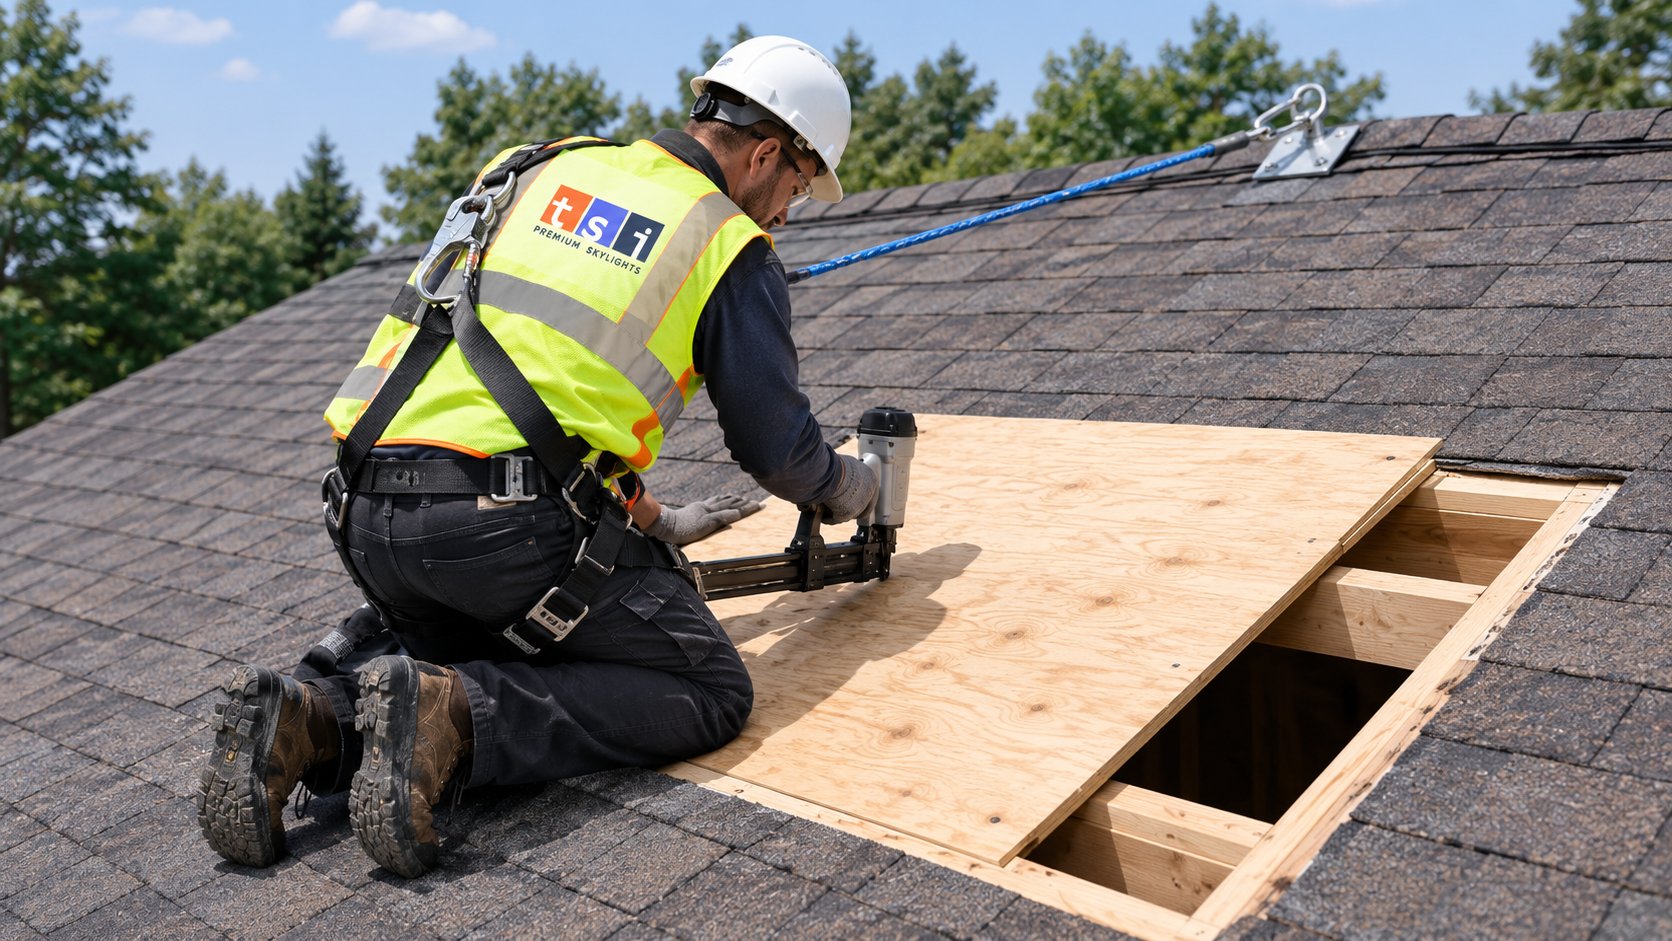
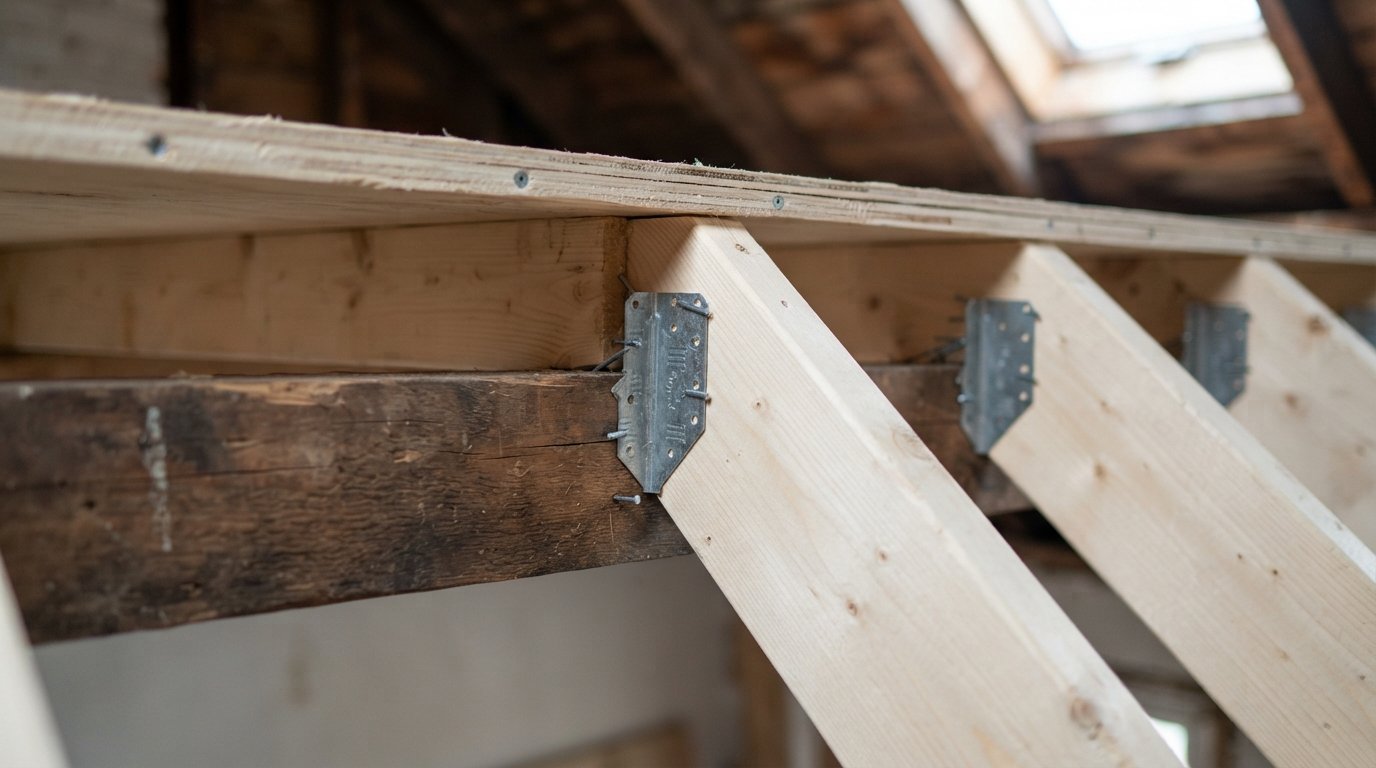
The existing opening is usually framed with headers top and bottom and doubled rafters on each side. Closing it means installing infill framing between the headers, typically short rafter sections or blocking at the same spacing as the rest of the roof, fastened with hangers or sistered to existing members. The new framing must sit flush with the old so the sheathing is flat. A skilled carpenter checks this with a straightedge across the opening before sheathing goes down, because even a small dip will show through the shingles.
Sheathing, underlayment and shingles
New sheathing is cut to fit, matching the thickness of the existing roof deck, with edges supported on framing or blocking. Then underlayment goes down, usually a self-adhered membrane over the patch area and lapped properly under the surrounding felt or synthetic underlayment so water always runs over, never under, a seam.
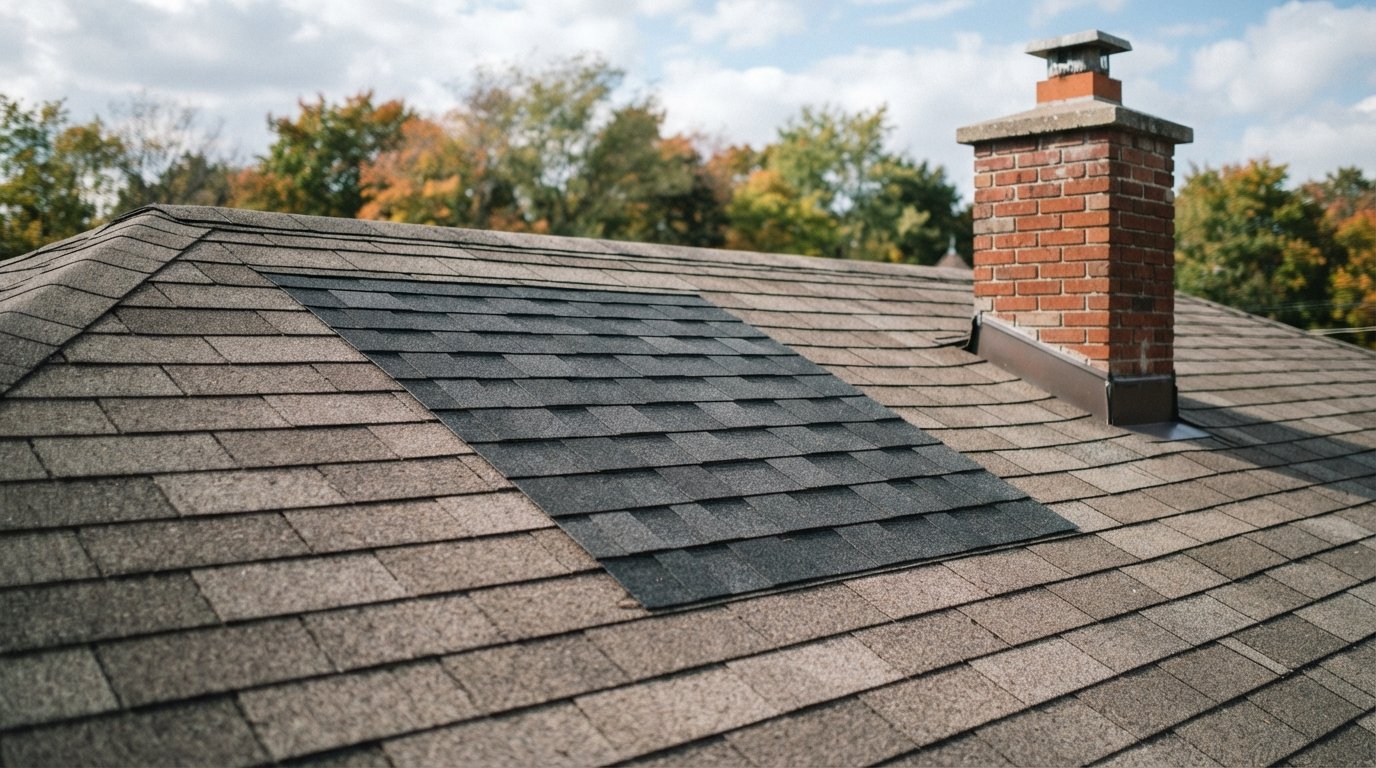
Shingles are the visible part. The patch is woven into the existing courses, not laid over them, which means lifting and removing shingles above and to the sides so the new ones interlock. Matching colour is the hardest part: shingles fade, and the exact line may be discontinued. Options include buying the closest current colour, salvaging shingles from a less visible area, or planning the skylight removal alongside a re-roof so the issue disappears entirely.
What Happens Inside: The Shaft, Insulation And Ceiling
The roof work is only half the job. Inside, the light shaft must be dealt with. Most skylights have a drywall shaft running from the roof opening down to the ceiling. When the skylight comes out, the shaft becomes a hollow box in the attic, and it needs to disappear.
The usual sequence looks like this:
- Remove the shaft. Drywall and framing around the shaft are removed in the attic, or at least opened, so the ceiling opening can be framed.
- Frame the ceiling opening. Joists or blocking are added so new drywall has solid support.
- Air seal. Before insulation goes back, the ceiling plane is sealed, including around the new drywall patch. This step is important for preventing warm, moist air from reaching the roof deck in the heating season.
- Insulate. Insulation is added over the patch to match the surrounding attic depth. A thin spot here is a common cause of cold ceilings and condensation.
- Drywall, tape and finish. The ceiling patch is taped, mudded, sanded and primed. Textured ceilings are harder to match, and a small area may stand out until the whole ceiling is repainted.
In vaulted ceilings or cathedral roofs, there is no attic to work from. The insulation and air sealing go into the rafter bay from inside or outside, and the detailing must follow the existing roof assembly. This is more involved and is worth discussing in detail with your contractor.
Signs A Previous Removal Was Done Badly
We are sometimes called to houses where a skylight was removed years ago by someone who treated it as a quick patch. The problems tend to repeat. If you have bought a house with a closed-up skylight, or you are comparing quotes, these are the warning signs.
| Symptom | Likely cause | What a proper fix involves |
|---|---|---|
| Visible dip or ridge in the shingles | Infill framing not flush with existing rafters, or sheathing unsupported at edges | Removing the patch, correcting framing and re-sheathing |
| Water stain on the ceiling patch | Underlayment not lapped under existing layers, or shingles laid over instead of woven in | Reopening the roof patch and redoing underlayment and shingle courses |
| Cold spot or frost on the ceiling in cold weather | Missing or thin insulation over the old opening, or no air seal | Air sealing and topping up insulation from the attic |
| Hollow box still visible in the attic | Shaft left in place with open top, trapping moist air | Removing the shaft, sealing the ceiling plane and insulating |
| Mould or dark staining on the roof deck | Warm, moist air leaking into the attic at the old opening | Air sealing, checking attic ventilation and replacing damaged wood |
Most of these problems cost more to fix than doing the skylight removal properly the first time. A patch that is flush, well-lapped and properly insulated simply stops being a concern.
Timing, Permits And What It Typically Costs
A straightforward skylight removal on an accessible asphalt-shingle roof, with the interior finished to a ready-for-paint standard, is typically a one or two day job depending on drywall drying time. Larger openings, rot repair, cathedral ceilings or flat roofs extend that. Early autumn is a good time for this kind of work: moderate temperatures help shingles seal and self-adhered membranes bond, and the ceiling is closed and insulated before the heating season starts.
Whether you need a building permit depends on the scope and your municipality. Simply closing an opening with like-for-like framing may be treated differently from work that alters structure. Check with your local building department before you start, and ask your contractor what they have seen required in similar cases.
Costs vary widely, so treat the ranges below as rough estimates for planning only.
| Scope | What is usually included | Typical estimate range (CAD) |
|---|---|---|
| Small skylight removal, attic above, shingle roof | Unit removal, infill framing, sheathing, underlayment, shingles, ceiling patch | Often around $1,500 to $3,000 |
| Larger opening or visible rot | As above plus replacing damaged framing and sheathing | Often around $2,500 to $4,500 |
| Cathedral or vaulted ceiling | Roof patch plus insulation and finishing within the rafter bay | Often around $3,000 to $5,500 |
| Removal combined with a sun tunnel | Closing most of the opening and installing a small tubular unit | Often around $2,500 to $5,000 |
| Removal during a planned re-roof | Framing and sheathing only, with shingles covered by the re-roof | Often lower, depending on the roofer’s scope |
These figures assume standard access. A steep or high roof, a flat membrane roof, or interior finishing beyond primed drywall will change the price. A site visit is the only way to get an accurate quote.
Alternatives Worth Considering Before You Close It Up
Removal is permanent in a practical sense. Putting a skylight back later costs more than keeping one now. So before you commit, it is worth asking whether one of these options solves your actual problem.
If heat or glare is the problem
Modern glazing with low-emissivity coatings, combined with a good shade, can reduce the heat and glare that drove you to consider skylight removal in the first place. Room-darkening shades are available for many units, including powered options for hard-to-reach ceilings. If the room is a bedroom and you need true darkness, a blackout shade on a new unit often does the job.
If the size is the problem
Reframing a large opening down to a smaller skylight keeps some daylight and cuts heat gain. It involves much of the same roof and ceiling work as removal, so the cost difference may be smaller than you expect.
If you only need a little light
A sun tunnel can deliver diffused daylight to a hallway, bathroom or closet through a small roof penetration, with far less heat gain and a smaller ceiling fixture. It is a good choice when the old skylight was lighting a space that no longer needs a view of the sky.
If the location is the problem
Sometimes the right move is to remove the old skylight and add a new one elsewhere, better placed for the new layout. Doing both at the same time keeps disruption to one visit. Our Peel Region skylight installation, replacement and repair team handles this kind of combined project regularly, as do our crews across the rest of the GTA.
Skylight Removal Questions
Can a skylight be removed without redoing the whole roof?
Will the patched area be visible from the street?
How long does it take to close up a skylight?
Do I need a permit to remove a skylight?
Is it better to remove a leaking skylight or replace it?
What about insulation after the skylight is gone?
Get Expert Help With Your Skylight Removal
Toronto Skylight Installers can assess whether removal, replacement, downsizing or a sun tunnel best suits your house, then close the opening properly on the roof and inside if removal is the right answer. We will explain the framing, roofing and insulation work involved before any work begins.
Call us today at (416) 365-7557 or request a free estimate.
Serving homeowners in Peel Region and across the wider GTA.