

Every autumn, as the furnace comes on for the first time, we get calls about skylights that seem to have started leaking. Water beads on the glass, drips land on the floor, and a brown ring appears on the drywall around the opening. In many of those houses the roof is fine. The real problem is poor skylight shaft insulation: the walls of the light shaft pass through a cold attic with little or no insulation, and warm, moist indoor air meets cold surfaces and condenses. Fixing it is usually simpler and cheaper than a roof repair, but only if it is diagnosed correctly.
This guide explains how light shafts lose heat, how to tell condensation from a roof leak, the choice between rigid foam and batts on shaft walls, why air sealing matters as much as insulation, and what to check in the attic before the cold weather settles in.
Why Skylight Shaft Insulation Matters
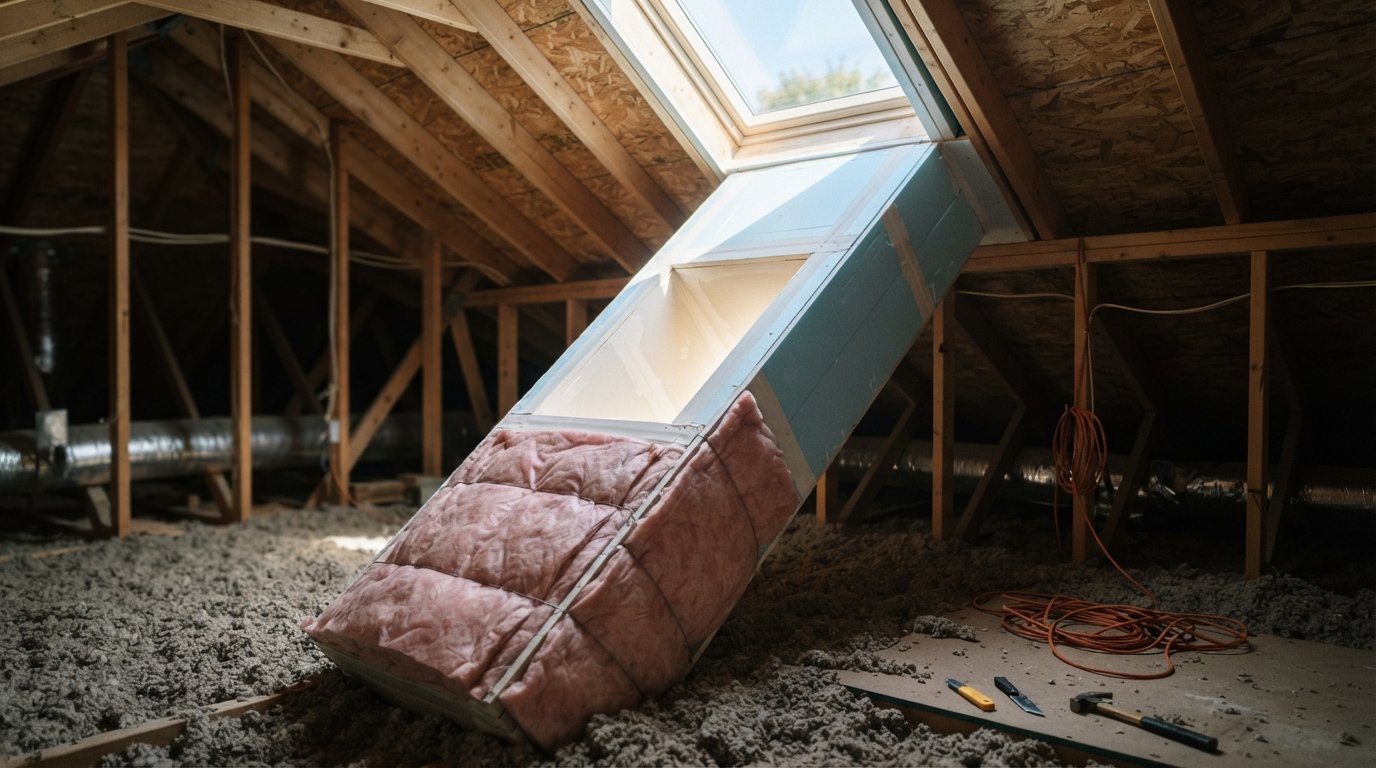
On most houses with an attic, a skylight on the roof and the opening in the ceiling are connected by a shaft, a short tunnel of framing and drywall that passes through the attic. Inside the house, the shaft looks like part of the ceiling. From the attic side, it is a box of thin drywall surrounded by air that is close to the outdoor temperature in the heating season.
That means the shaft walls are effectively exterior walls. If they are left bare, or covered with a few loose batts that have slumped over the years, heat pours out through them. The drywall inside the shaft gets cold. When warm indoor air touches it, moisture condenses, just as it does on a cold drink in summer. On colder nights it can form frost on the shaft walls and the skylight frame, which melts and drips when the sun comes out.
Many houses in the GTA were built or renovated with shafts that were insulated minimally, if at all. Even where insulation was installed properly, attic work over the years, such as wiring, ducting or pest activity, may have disturbed it. Good skylight shaft insulation turns that cold box back into part of the house’s thermal envelope.
Condensation Or Roof Leak? How To Tell
The first step is to work out whether the water comes from inside or outside. The treatments are completely different, and misdiagnosis wastes money. If you are unsure, our page on skylight repairs for leaks and condensation explains how we investigate both.
As a rule of thumb, condensation shows up on cold mornings and across several shaft walls, while a roof leak tends to appear during or after rain at one spot. That is only the short version; we cover how to read stain patterns in detail in our separate guide to skylight water damage. Both problems can also exist at once, and a careful inspection from the roof and the attic separates the two.
| Sign inside the room | What it suggests about the shaft |
|---|---|
| Damp band or frost along the shaft walls on cold mornings | Shaft surfaces are cold, so the insulation or air sealing is likely thin or missing |
| Cold draught felt near the ceiling opening | Air is moving through gaps at the top or corners of the shaft |
| Paint that keeps bubbling or staining near the ceiling plane | Repeated moisture at the base of the shaft, often from air leakage |
Where Heat Actually Escapes: Shaft Walls And The Ceiling Plane
Skylight shaft insulation alone does not solve the problem if warm air can flow around it. Heat and moisture leave through two routes.
Conduction through the shaft walls
Heat passes directly through the thin drywall and framing of the shaft into the cold attic. The fix is insulation on the attic side of the shaft walls, ideally to a level that approaches what the rest of the attic has, within the practical limits of the space around the shaft.
Air leakage at joints and the ceiling plane
Warm, moist air escapes through gaps: where the shaft drywall meets the ceiling drywall, at the corners of the shaft, around the top where the shaft meets the skylight frame or curb, and through any holes for wiring or lights. This air carries far more moisture than conduction alone, and when it reaches the cold attic, it can condense on the roof deck or the shaft framing. Air sealing these gaps is often the most important part of the job.
This is why a shaft that has had batts thrown against it but was never sealed can still condense. Warm air simply flows through and behind the insulation.
Rigid Foam Or Batts On Shaft Walls?
Several materials can be used for skylight shaft insulation. Each has strengths and drawbacks, and many installers use a combination.
| Approach | How it is installed | Advantages | Drawbacks |
|---|---|---|---|
| Batts between shaft studs | Friction-fit into the framing on the attic side | Inexpensive and familiar; fills stud cavities | Tend to sag or fall away on vertical walls; exposed faces allow air to wash through |
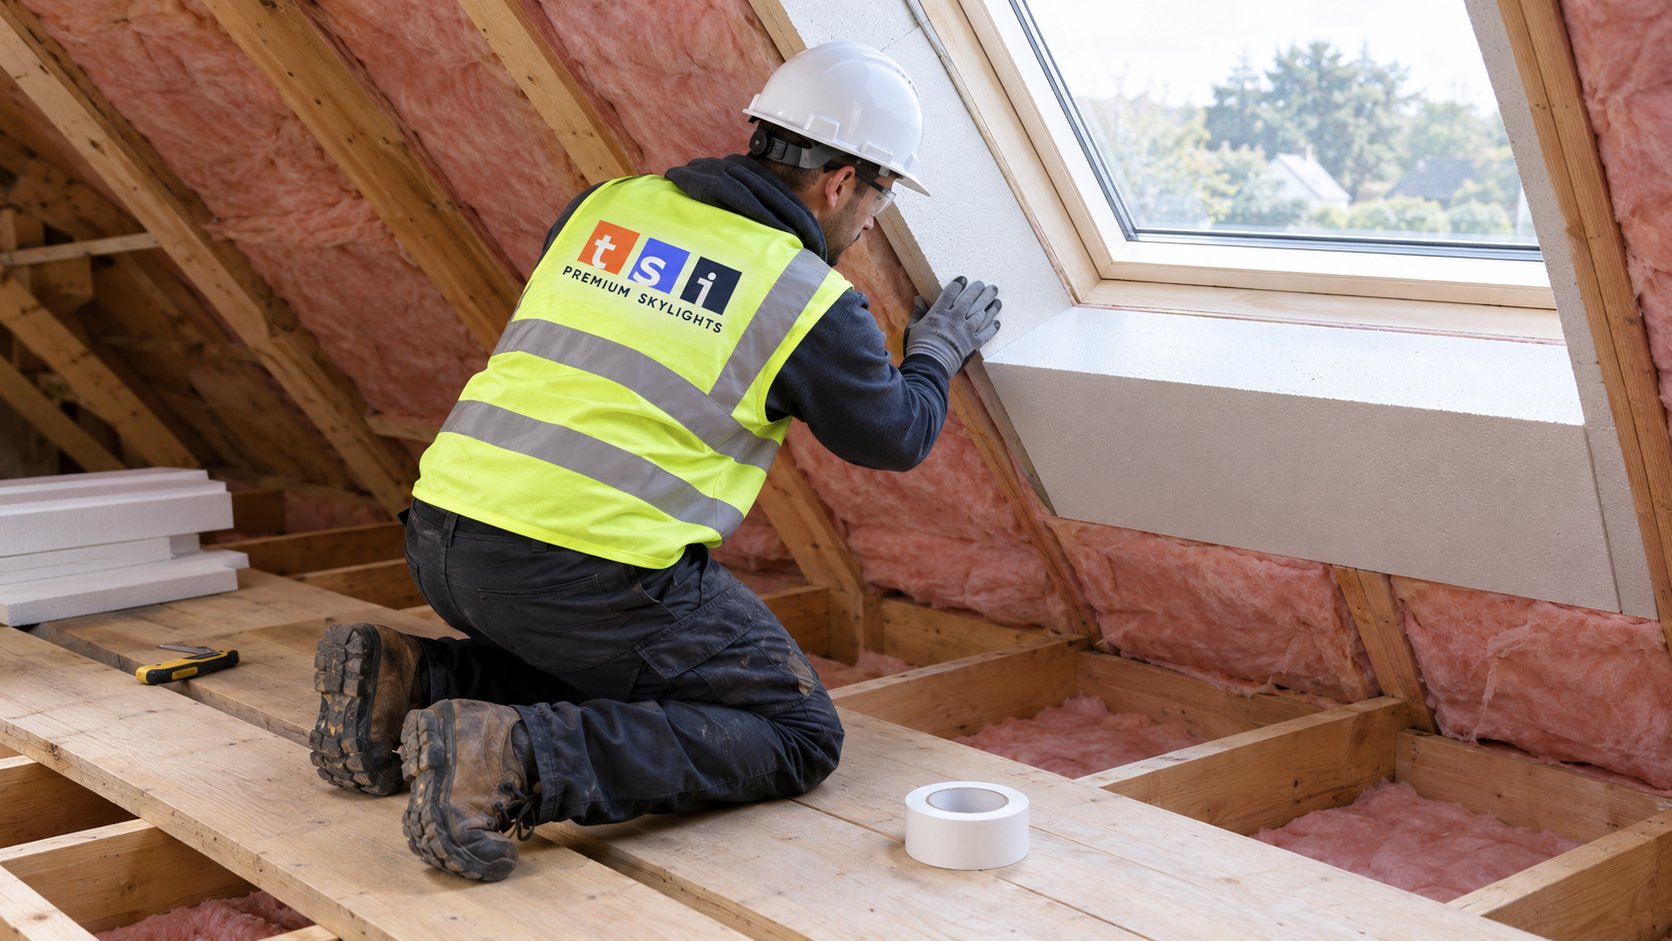
| Rigid foam board over the framing | Cut to fit, fastened to the attic side with joints and edges taped or sealed | Covers the studs as well as the cavities; stays in place; limits air movement | Needs careful cutting around sloped or splayed shafts; some products need a protective covering in certain locations |
| Batts plus rigid foam | Batts in the cavities, then foam board over the outside | Good overall insulation with a continuous outer layer that holds the batts | More labour and material; the most thorough option |
| Spray foam | Applied to the attic side by a specialist | Fills irregular shapes and seals air leaks in one step | Higher cost; requires a trained applicator and attention to product requirements |
| Blown-in insulation around the base | Topped up around the shaft where it meets the ceiling | Helps the ceiling plane around the shaft | Does not insulate the vertical shaft walls on its own |
In practice, a common approach is to fill the stud cavities with batts, cover the attic side with rigid foam taped at the joints, and then bring the surrounding attic insulation up around the base of the shaft. The foam holds the batts in place, reduces air washing, and covers the framing, which otherwise acts as a thermal bridge. Where the shaft is splayed or oddly shaped, rigid foam takes more cutting and fitting, and spray foam may be worth considering.
A note on materials: some foam insulation products have specific requirements about where they can be left exposed. Follow the manufacturer’s instructions and confirm with your municipality if you are unsure what applies to your attic.
Air Sealing: The Step That Makes Insulation Work
Before insulation goes on, gaps must be sealed. In most shafts, the sequence looks like this:
- Top of the shaft. Seal the joint between the shaft drywall and the skylight frame or curb. On many older installations there is a visible gap here.
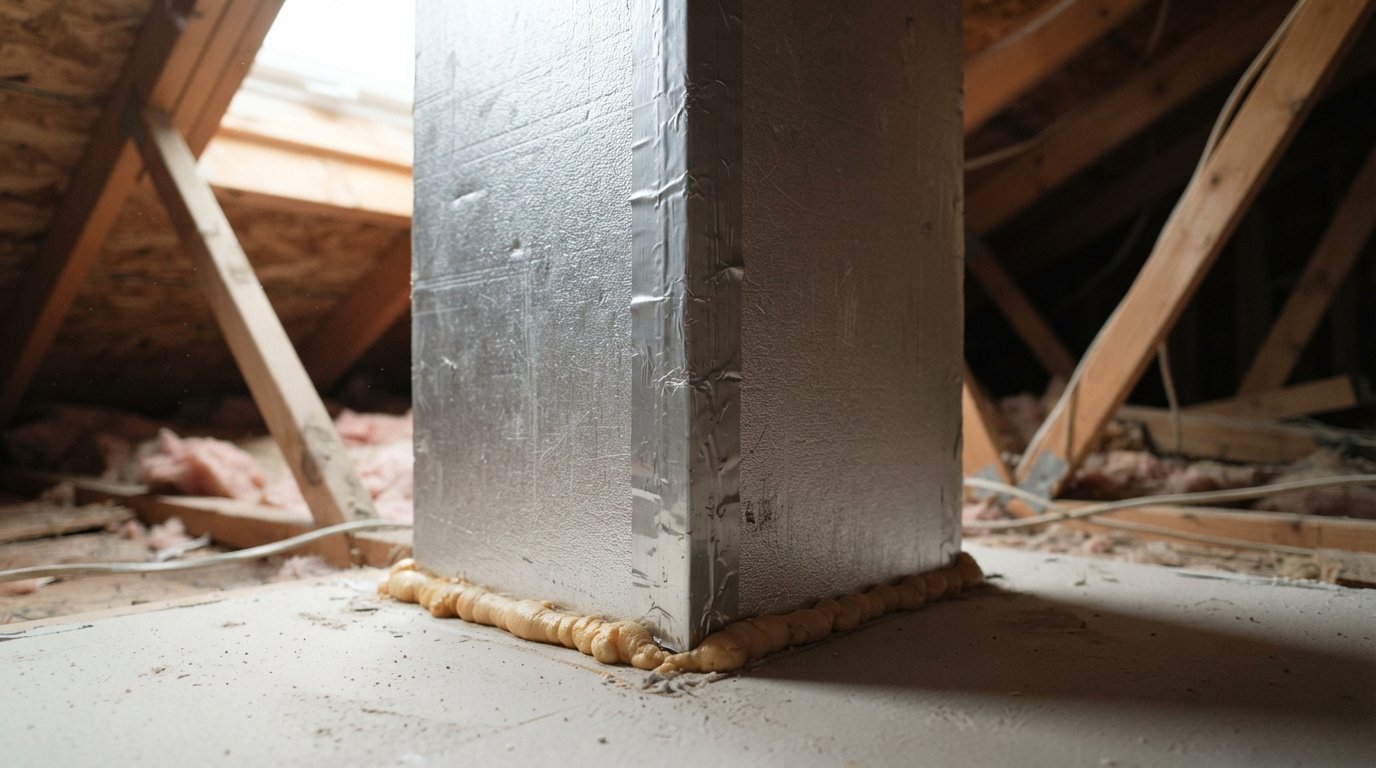
- Shaft corners and seams. Seal drywall joints from the attic side where possible, using a suitable sealant or foam.
- The ceiling plane. Seal where the shaft meets the ceiling drywall, one of the most common air leakage paths in the house.
- Penetrations. Seal around wires, pot lights or any other holes through the shaft or ceiling nearby.
- Interior face. On the room side, check the drywall finish and paint. A vapour-retarding primer or paint on the shaft interior can help limit moisture movement into the wall.
Once the air sealing is complete, the skylight shaft insulation goes on. The attic insulation around the base of the shaft is then restored or topped up so there is no low spot at the ceiling.
What An Autumn Attic Check Should Cover
Early autumn is the best time to check your skylight shaft insulation, before the first cold snaps cause frost and drips. You do not need to go into the attic to get a first impression: open the hatch, shine a flashlight in from the hatch opening without stepping in, and note what you can see from there. Anything beyond that, including stepping onto the framing, moving insulation or a close look at the shaft itself, is work for the installer. These are the points an inspection covers.
| What to check | What good looks like | What a problem looks like |
|---|---|---|
| Shaft walls | Insulation covering all four sides, held firmly in place | Bare drywall, visible studs or batts lying on the attic floor |
| Top of the shaft | Tight, sealed joint where the shaft meets the skylight frame or curb | Visible gaps, daylight or dark dust streaks showing air movement |
| Base of the shaft | Attic insulation continuous and level up to the shaft | A trough or low spot around the shaft at the ceiling plane |
| Framing and roof deck | Clean, dry wood | Dark staining, mould or rusty nail tips near the shaft |
| Nearby penetrations | Wires and fixtures sealed where they pass through | Open holes around wiring or pot lights beside the shaft |
| Fans and ducts | Bathroom and kitchen fans ducted to the outside | Ducts ending in the attic or disconnected near the shaft |
Dust streaks deserve a special mention. Fibreglass acts as a filter, so where air has been flowing through a batt for years it often leaves grey or black lines. Those lines point straight at the leaks that need sealing before any new skylight shaft insulation goes on. Rusty nail tips poking through the roof deck above the shaft are another clue: they collect frost from moist attic air and are a sign that warm air is escaping somewhere nearby.
If you find problems, they are usually a manageable repair. Most skylight shaft insulation and air sealing jobs are completed in a few hours to a day from the attic side, without touching the roof. For homeowners west of the city, our Peel Region skylight installation, replacement and repair team can carry out the inspection and the work in the same visit.
Indoor Humidity And The Skylight Itself
Skylight shaft insulation reduces condensation, but it is not the whole story. Two other factors play a part.
Indoor humidity
The more moisture in the air, the more condensation you will get on any cold surface. In the heating season, keep indoor humidity moderate. Run bathroom fans during and after showers, use the range hood while cooking, and avoid drying large loads of laundry indoors. A simple humidity gauge in the room can show whether levels rise on the days you see condensation. If you have a humidifier on the furnace, make sure it is set appropriately for the outdoor temperature.
The skylight unit
Older skylights with single glazing or aluminum frames without thermal breaks often have very cold interior surfaces, and they will condense even with a well-insulated shaft. If the glass itself is the main source of the problem, replacement with a modern, double-glazed unit is often more effective than any amount of shaft work. Your installer can tell you whether the unit, the shaft or both need attention. When replacing, it makes sense to insulate and seal the shaft at the same time, since the work area is already open.
What It Typically Involves And Costs
For a typical shaft in an accessible attic, the work of air sealing, adding batts and rigid foam, and topping up the surrounding insulation is usually a modest job measured in hours rather than days. Costs vary with the shaft size, access, the materials chosen and whether drywall repairs are needed inside. As a general guide, standalone shaft insulation is often a few hundred to around a couple of thousand dollars, and it is more economical when combined with other skylight work. Treat this as a rough estimate; a site visit gives an accurate price.
When you compare quotes, ask each contractor the same questions. Will they air seal the top, corners and base of the shaft before insulating, and with what materials? Which insulation will go on the shaft walls, and how will it be held in place? Will they restore the attic insulation they disturb around the base? Will they check the skylight flashing and the unit itself while they are there, so you are not paying to insulate around a problem that will need attention next year? A contractor who answers these clearly, and who wants to look at the roof side as well as the attic, is more likely to solve the condensation rather than just cover it up. Ask for photos of the finished shaft from the attic side too, since it is a space most owners rarely see.
Houses with cathedral ceilings have no attic shaft, and the insulation sits in the rafter bays around the skylight. Improving it may require work from inside or during a roof project, which changes the scope and cost considerably.
Skylight Shaft Questions
Why is my skylight dripping when it has not rained?
Is rigid foam better than batts for a light shaft?
Does air sealing really make a difference?
When should I check my skylight shaft?
Can I fix condensation without replacing the skylight?
Does the work require access to the roof?
Book A Skylight Shaft Insulation Inspection
Toronto Skylight Installers can inspect your skylight and light shaft, tell you whether you are dealing with condensation, a leak or both, and insulate and seal the shaft properly before the heating season is in full swing.
Call us today at (416) 365-7557 or request a free estimate.
Serving homeowners in Peel Region and across the wider GTA.