

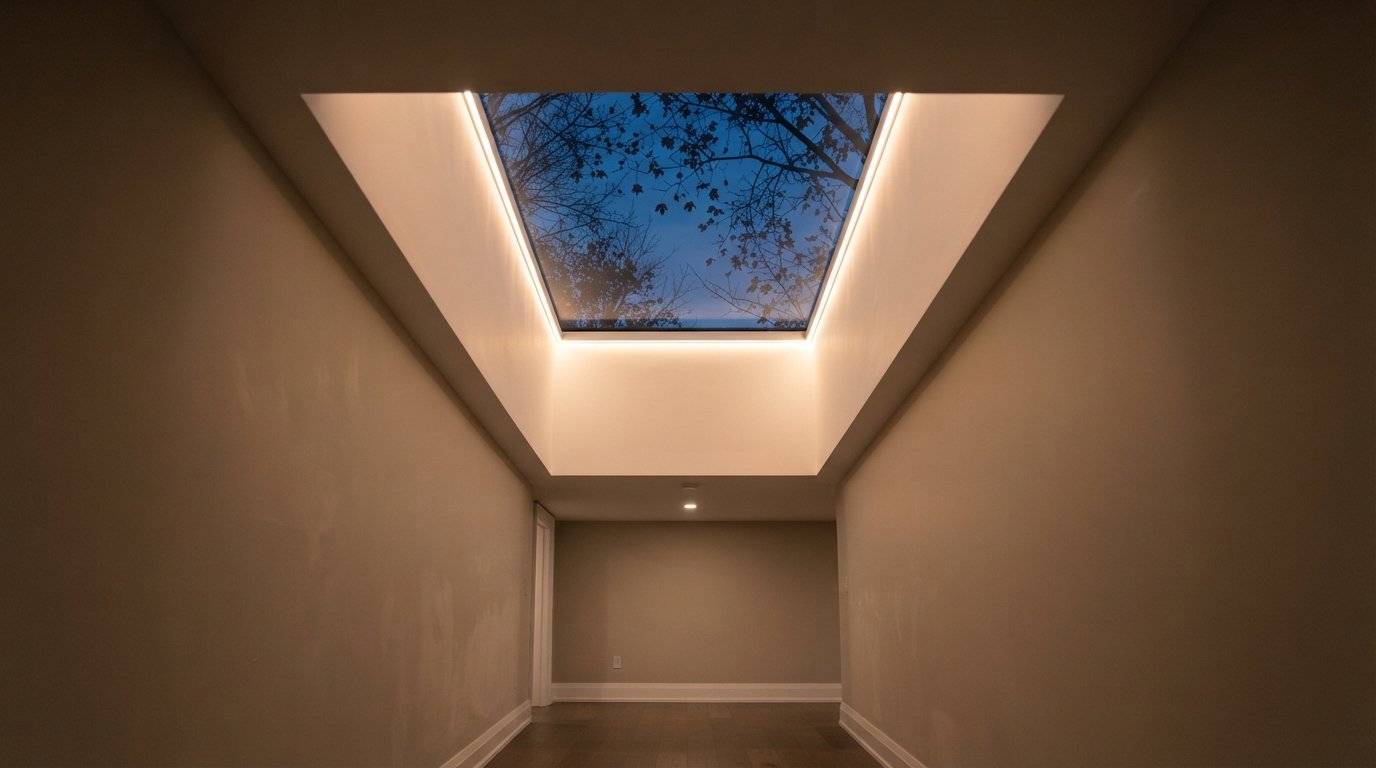
Skylight shaft lighting solves a problem most people only notice after their first autumn with a new skylight. All day the shaft glows; then by late afternoon the light fades, and by evening the opening becomes a dark hole in the ceiling with a black pane of glass at the top. The room under it can feel gloomier at night than it did before the skylight went in, simply because there is now a deep, unlit void overhead.
The fix is to light the shaft itself, so it reads as a bright well after dark instead of a hole. What follows covers the main fixture options, where to place them, how wiring usually reaches a shaft through the attic, why heat and vapour sealing matter so much in an insulated shaft, and how to avoid glare and reflections at night.
Why skylight shaft lighting changes how a room feels at night
A light shaft is a box of drywall running from the ceiling up through the attic to the skylight. During the day, its walls bounce sky light down into the room. At night they do the opposite: they are the darkest surfaces in the room, and the glass at the top acts like a black mirror. Ceiling lights placed beside the shaft do little to help, because the opening sits above them and its walls stay in shadow.
Good skylight shaft lighting puts light onto the shaft walls themselves. When the walls are lit evenly, the eye reads the shaft as a soft, glowing surface, the black glass recedes, and the ceiling no longer has a hole in it. It also has a practical side: in hallways and stairwells, the shaft is often in the very spot where you want light at night.
The easiest time to add it is when the shaft is open, during a new installation or a replacement that involves rebuilding the shaft. If you are planning that work, mention lighting early in the conversation about skylight installation, because it affects how the shaft is framed, insulated and finished.
Fixture options for a skylight shaft
There are four common approaches to skylight shaft lighting, and many good results combine two of them.
LED strips in a channel
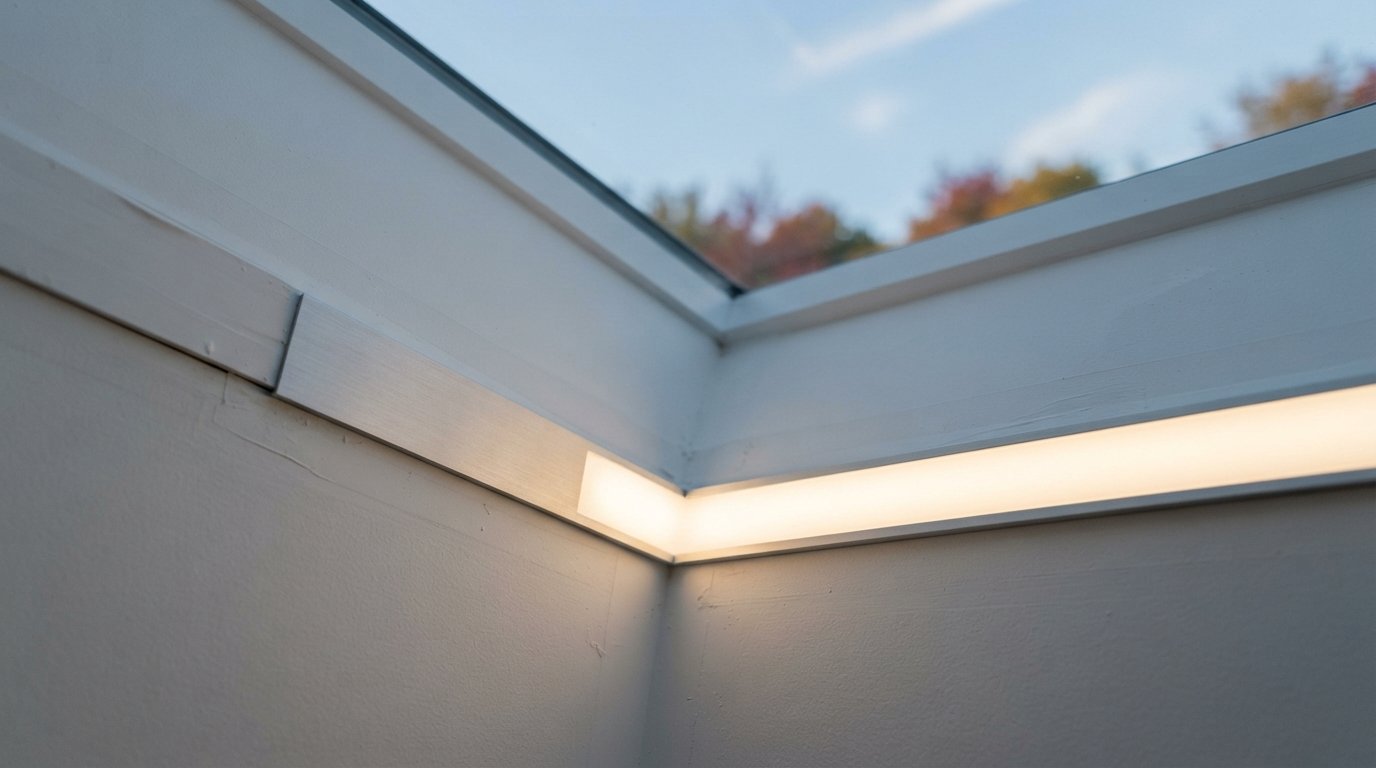
An LED strip set in an aluminum channel with a frosted diffuser can run along one or more edges of the shaft, usually just inside the ceiling opening and aimed up the walls. Because the channel can be surface-mounted to the framing or set into a shallow recess in the drywall, it often needs only one small penetration for the cable, which makes it the easiest option to keep airtight. The strip’s power supply, usually called a driver, must be placed somewhere accessible and suitable for it, such as in an approved box on the warm side, not buried in attic insulation.
Small recessed fixtures
Slim LED recessed fixtures, sometimes called wafer or canless lights, can be installed in the shaft walls or in the ceiling at the shaft’s edge. They give a crisper, more directional light. Because each one is a hole through the shaft wall into the insulation, they must be rated for contact with insulation and for airtight installation, and every penetration must be sealed to the air and vapour barrier.
Wall sconces and uplights below the shaft
Where the shaft sits over a stairwell or a tall wall, an uplighting sconce mounted on the wall below can wash light up into the shaft without any fixture inside it. This avoids penetrations in the shaft entirely and is often the simplest retrofit when the drywall is finished, because the wiring stays in the heated wall.
Lighting for sun tunnels
Tubular skylights have their own options. Some manufacturers offer a light kit that sits inside the tube, so the ceiling diffuser doubles as a light fixture after dark. If you have a sun tunnel skylight, check what is currently offered for your model before adding a separate fixture nearby.
| Option | Where it goes | Light effect | Sealing and installation notes |
|---|---|---|---|
| LED strip in an aluminum channel | Along the inside edge of the shaft opening or in a recess near the top | Even wash up or down the shaft walls | Few penetrations; driver must be accessible and not buried in insulation |
| Slim recessed LED fixtures | In the shaft walls or ceiling at the shaft edge | Directional pools of light | Must be rated for insulation contact and airtight use; seal each opening |
| Wall sconce or uplight | On a wall below the shaft, often in a stairwell | Washes the shaft from below | No shaft penetrations; wiring stays in the heated wall |
| Surface fixture on the shaft wall | Mounted on the drywall face | Decorative or directional | Single box penetration; box must be sealed and accessible |
| Sun tunnel light kit or night light | Inside the tube, per the manufacturer | Light from the diffuser itself | Use the manufacturer’s accessory and instructions for the model |
Where to put the light: placement and effect
In skylight shaft lighting, placement matters more than fixture choice. The goal is to light surfaces, not to shine a bulb at people or at the glass.
- At the ceiling line, aimed up. A strip hidden just inside the bottom of the shaft lights the walls from below. It is invisible from most of the room, and the glow fades gently toward the glass, which suits bedrooms and living spaces.
- Near the top, aimed down. Light set near the skylight end shines down the shaft and into the room, which is more useful for task light in kitchens and hallways. It needs careful shielding so the fixture is not visible from below and does not reflect in the glass.
- On one wall only. Lighting just the wall opposite the main viewing direction often looks more natural than lighting all four sides equally, and in a flared shaft the long sloping wall is the obvious candidate.
Colour temperature affects mood. Warm white, around 2700K to 3000K, usually blends with the rest of a home’s evening lighting. Cooler light can make a shaft look clinical at night. Whatever you choose, match it to the room’s other fixtures and put the shaft on a dimmer so you can turn it right down.
| Placement | Best for | Glare risk | Watch out for |
|---|---|---|---|
| Hidden strip at the ceiling line, uplighting | Bedrooms, living rooms, calm evening light | Low, fixture is out of sight | Strip visible from directly below unless the channel is shielded |
| Fixtures near the top, downlighting | Kitchens, hallways, task light | Moderate | Reflections in the glass and bright points visible from below |
| One lit wall in a flared shaft | Shafts seen mainly from one side | Low | Uneven light if the lit wall is short or interrupted |
| Uplight sconce on the wall below | Stairwells and tall walls | Low to moderate | Sconce must be placed so it is not at eye level on the stairs |
| Recessed light in the ceiling beside the shaft | General room light | Moderate | Does little for the shaft itself, which stays dark |
Avoiding glare and reflections at night
Glare is the most common complaint about poorly planned skylight shaft lighting. At night the skylight glass reflects whatever is lit inside the shaft. A bright point source near the glass will show up as a doubled image, and a strip aimed straight at the pane can bounce back into the room. Aim light at the drywall rather than the glass, use diffused sources, and keep fixtures shielded from direct view.
A shade over the skylight helps more than people expect. Closing a room-darkening skylight shade at dusk hides the black glass, gives the shaft lighting a pale surface to bounce from, and blocks early morning light in bedrooms. Shades also cut heat loss on cold nights. Finally, finish the shaft in a matte or eggshell paint; glossy walls show every hot spot from a fixture.
Wiring routes through the attic
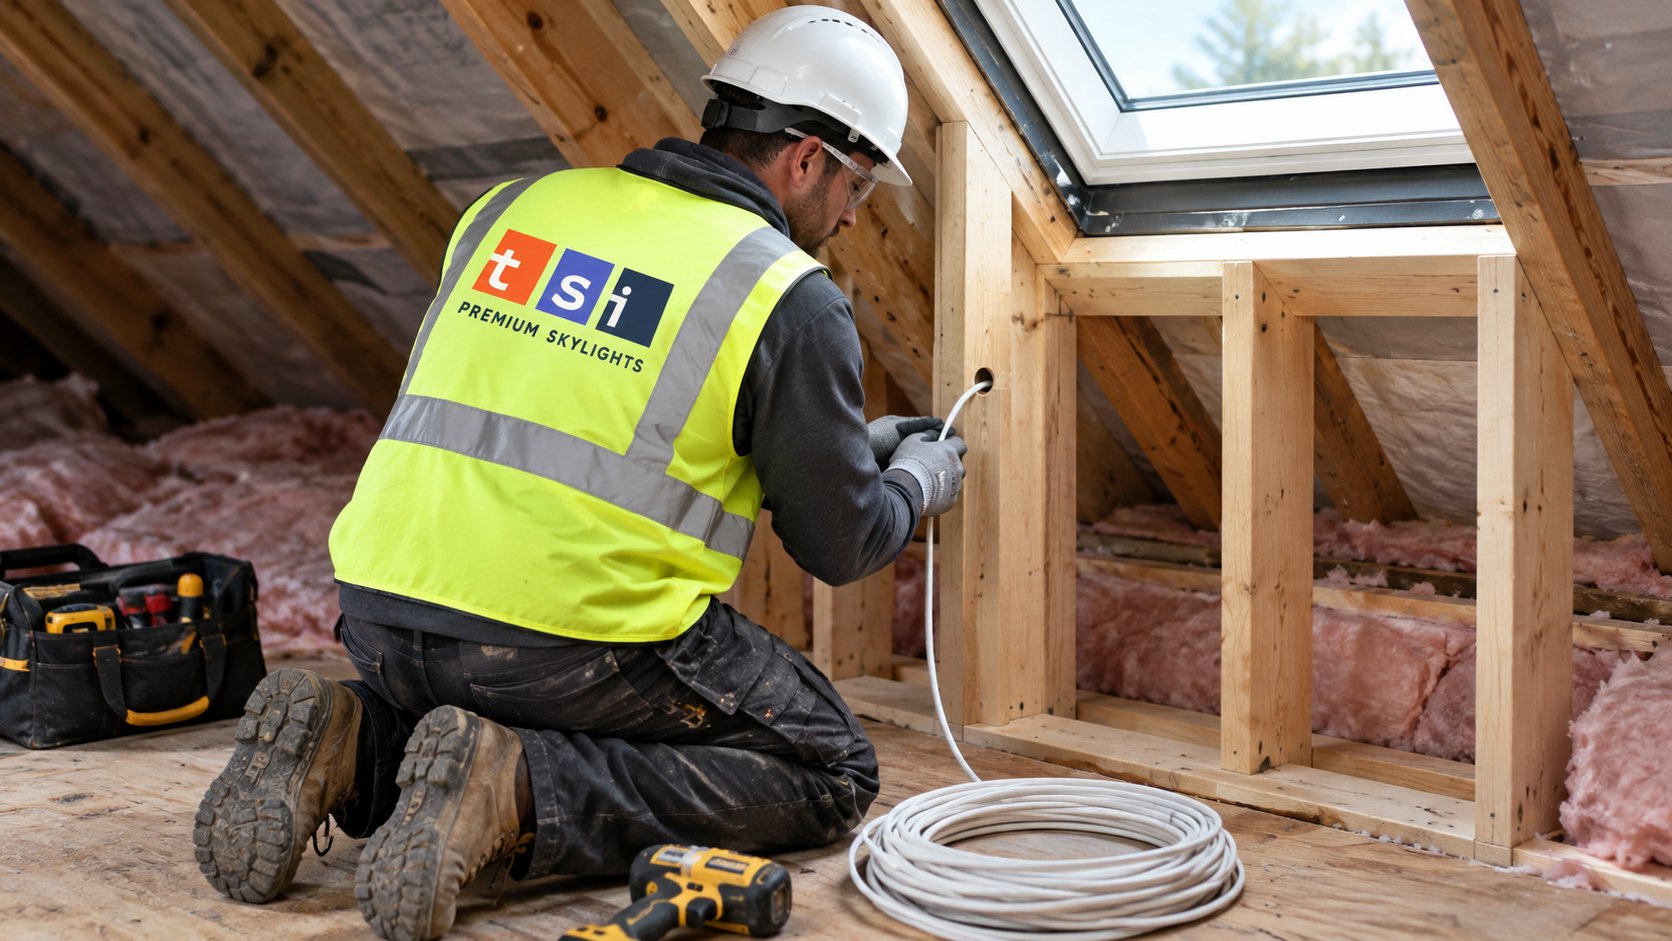
Most skylight shaft lighting is wired from the attic. Typically, a licensed electrician picks up power from a nearby ceiling box or a dedicated new circuit, runs the cable across or through the ceiling joists to the shaft, and brings it into the shaft framing at the point where the fixture or driver will sit. A switch, or a dimmer compatible with the LEDs, is usually added at the room entrance below. In stairwells, three-way switching from top and bottom is worth planning from the start.
A few practical points shape the route. Cable has to be protected where people walk or where it crosses near the attic hatch. Junction boxes and drivers must stay accessible, which rules out burying them deep in blown insulation. And in older homes, a nearby ceiling box may be on wiring that should not be extended, so the electrician will want to check what is there first.
In Ontario, electrical work in a home generally requires a notification of work, often called an ESA permit, filed with the Electrical Safety Authority, and anyone you hire to do it must be a Licensed Electrical Contractor. New circuits are included. Rules on who can do what change from time to time, so check the ESA’s current guidance or ask your electrician to confirm the permit before work starts.
Heat, air and vapour sealing in an insulated shaft
A shaft is effectively an exterior wall surrounded by a cold attic. It has insulation on the attic side and an air and vapour barrier on the room side. Every hole cut for a fixture interrupts that barrier, and warm, moist house air will find any gap. In cold weather that air reaches the cold side of the insulation, condenses, and shows up as frost on the attic side, damp insulation, and water stains on the shaft drywall when it melts.
- Choose rated fixtures. Recessed fixtures in a shaft wall should be rated for insulation contact and for airtight installation, so insulation can be packed around them safely.
- Seal every penetration. Cable holes, boxes and fixture openings need to be sealed to the air and vapour barrier with appropriate sealant, gaskets or vapour barrier boxes.
- Keep insulation continuous. Insulation must be restored around fixtures and boxes on the attic side, without gaps.
- Respect heat from drivers. LED drivers produce some heat and need the location their instructions require; a driver smothered in insulation can fail early.
Getting this right matters as much as the light itself. Skylight shaft lighting that leaves a shaft frosting up every cold night is not a success. This is one reason we prefer to coordinate lighting with the shaft build, so the barrier can be detailed around the fixture positions instead of being patched afterwards.
Retrofitting lighting into an existing shaft
If your shaft is already finished, there are still good options for adding skylight shaft lighting. A wall-mounted uplight below the shaft needs no work inside it. A surface-mounted LED channel can be fixed along the inside edge of the opening, with a single cable entry sealed from the attic side. Recessed fixtures are possible too, but they mean cutting the drywall, pulling back insulation from the attic side and resealing the barrier around each one, which is more involved.
A good retrofit sequence usually runs like this: confirm attic access to the shaft, check the condition of the existing insulation and barrier (and fix anything wrong while it is exposed), decide fixture positions with the electrician, wire and seal, restore insulation, then patch and paint. Adding lights during a skylight replacement, which our crews offering skylight installation and repair in York Region will usually suggest, makes sense because the shaft is opened at that point anyway.
| Step | Who usually handles it | Why it matters |
|---|---|---|
| Plan fixture type, position and switching | Homeowner with installer and electrician | Positions decide where the barrier and framing need detailing |
| Confirm permit and wiring source | Licensed Electrical Contractor | New circuits and extensions need a notification of work |
| Frame and rough in boxes or channels | Skylight installer and electrician | Solid backing makes fixtures straight and secure |
| Install insulation and seal the barrier | Skylight installer | Prevents frost and condensation in the shaft |
| Drywall, paint and fit fixtures | Installer and electrician | Matte finish reduces hot spots and glare |
The cost of skylight shaft lighting depends mostly on how easily power can reach the shaft and how many penetrations are involved, so ask for a combined quote after a site visit rather than relying on general figures.
Frequently asked questions
What is the best light for a skylight shaft?
Who is allowed to wire lights into a skylight shaft?
Will lights in the shaft cause condensation?
How do I stop reflections in the skylight glass at night?
Can lighting be added to a finished shaft?
What colour temperature works best?
Plan skylight shaft lighting with your next skylight project
The best time to light a shaft is while it is being built or rebuilt. Toronto Skylight Installers can plan the shaft, insulation and sealing around your lighting so it stays dry and glare-free, working alongside your licensed electrician for the wiring. Call us today at (416) 365-7557 or request a free estimate.
Helping homeowners across York Region and the wider GTA enjoy their skylights day and night.