

A brown ring on the ceiling next to a skylight is one of those things homeowners notice, worry about, then paint over and hope for the best. Skylight water damage rarely stays cosmetic for long, though. The stain is the visible end of a moisture problem, and until you know where the water is coming from, any repair to the ceiling is temporary. The good news is that the pattern of the stain usually tells you a great deal about the cause.
This guide explains how we read stains around skylights, what damage to expect in the shaft and ceiling, how to check for mould, the right order for repairs and what a finished repair can realistically look like.
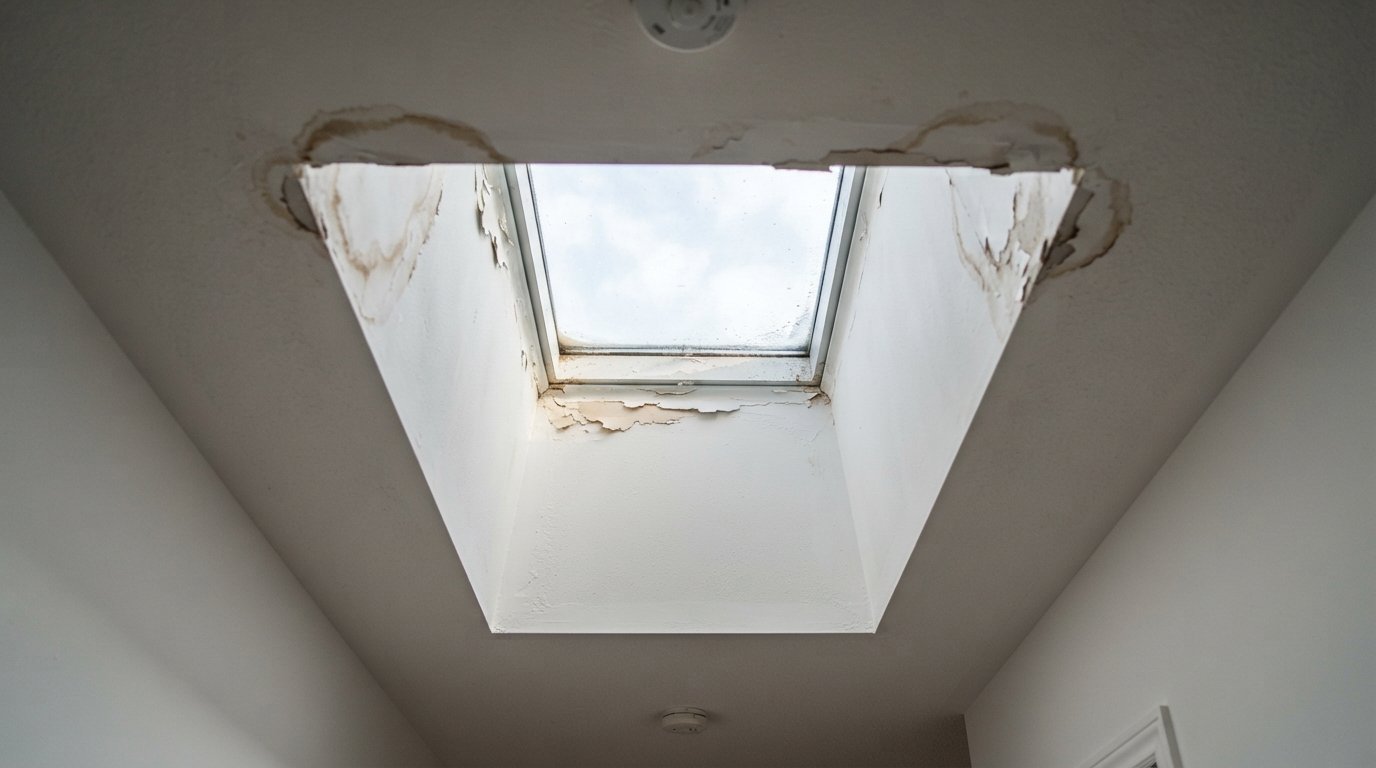
What Skylight Water Damage Is Telling You
Skylight water damage comes from three main sources, and they leave different fingerprints. Water can enter from outside through the flashing, it can get past the glass or its seals, or it can form inside the house as condensation on cold surfaces. Many homeowners assume every stain is a roof leak. In our experience a fair share of calls turn out to be condensation, and a roof repair would not have fixed them.
Before you call anyone, a little observation helps. Note when the water appears: during or after rain, on cold mornings, or after long hot showers. Note where it appears: at the top of the shaft, the bottom, a single corner or all around. Take photos with the date. These notes are useful for whoever investigates, and they often narrow the cause to one source before anyone climbs a ladder.
Reading The Stain Pattern
Here is how the three common causes usually show up. They are patterns, not rules, and more than one cause can be present at once.
Flashing leaks
Water getting past the flashing usually enters at the top of the skylight, where roof water runs down toward the unit, or at the upper side corners. Inside, the stain tends to appear at the top of the shaft on the uphill side, or at one or both upper corners. It shows up during or shortly after rain, especially wind-driven rain, and it may be worse after heavy storms. Sometimes water tracks along a rafter and appears some distance from the skylight, which confuses the diagnosis.
Glass and seal failures
If the gasket around the glass or the seal at the frame has failed, water tends to appear at the bottom of the skylight frame, dripping from the lower edge of the glass or the sash. On venting units, worn weatherstripping or a sash that does not close fully can let rain in. Cracked glass, of course, can leak anywhere along the crack.
Condensation
Condensation forms when warm, humid indoor air touches a cold surface: the glass, the frame or poorly insulated shaft walls. It appears on cold days, often on clear mornings, whether or not it has rained. The staining is usually more even: along the bottom edge of the shaft, around the ceiling opening or on the sill below the glass. Frost or droplets on the inside of the glass are a strong clue. Bathrooms and kitchens with skylights are the most common places for it.
| Pattern | When it appears | Most likely cause |
|---|---|---|
| Stain at the top or upper corners of the shaft | During or after rain | Flashing leak at the head or sides |
| Drips from the lower edge of the glass or sash | During rain | Failed glass gasket, frame seal or venting weatherstripping |
| Even staining around the ceiling opening | Cold mornings, not linked to rain | Condensation from indoor humidity |
| Frost or droplets on the room side of the glass | Cold weather | Condensation, poor shaft insulation or high humidity |
| Stain some distance away from the skylight | After heavy rain | Leak tracking along framing from the skylight or nearby roofing |
| Fog between the panes, with no drips | Any time | Failed insulating glass seal (not usually a leak source) |
If the pattern points to flashing or seal failure, our skylight repairs service begins with finding the entry point from the roof, not with patching the ceiling.
What The Damage Looks Like Inside The Shaft
The shaft, sometimes called the light well, takes most of the punishment. Its drywall returns, the short panels that line the tunnel from ceiling to skylight, sit right in the path of water and condensation. Typical skylight water damage includes:
- Staining and discolouration, usually yellow-brown rings with a darker edge where water dried.
- Bubbling or peeling paint as moisture pushes the paint film away from the drywall.
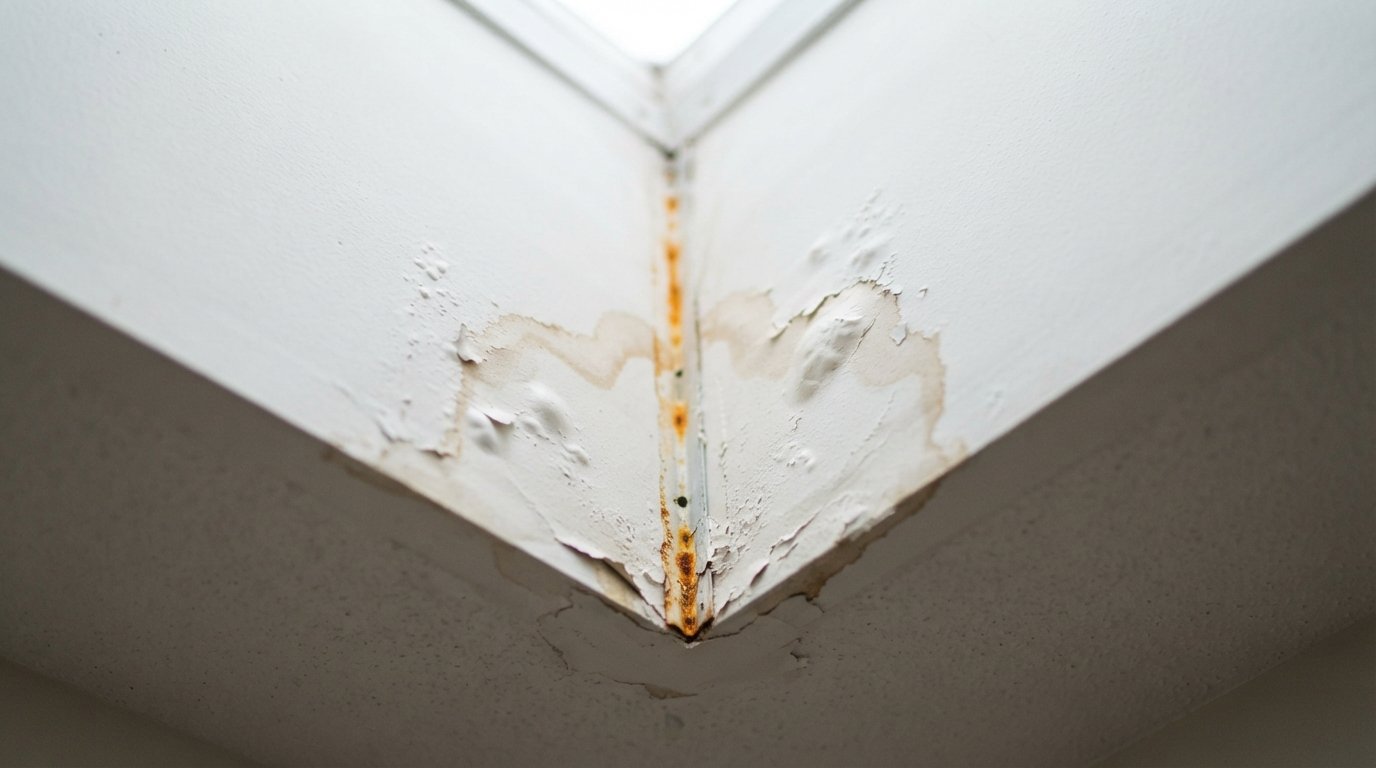
- Lifted tape joints at inside corners, where the tape loses its bond and bubbles.
- Rusted corner bead along the ceiling opening, showing as orange lines through the paint.
- Soft or sagging drywall where water has soaked in repeatedly. This drywall usually needs replacing rather than patching.
- Damaged trim or wood sills at the base of the skylight, which can swell, split or blacken.
| Shaft finish problem | Usually repairable in place | Usually needs replacing |
|---|---|---|
| Dry stain on firm drywall | Yes, with stain-blocking primer and paint | No |
| Bubbled paint, drywall still firm | Yes, scrape, dry, prime and repaint | Only if bubbling returns |
| Lifted tape at inside corners | Yes, cut out and retape once dry | If the paper face below is damaged |
| Rusted corner bead | Sometimes, if rust is only surface | Often, bead and adjoining mud replaced |
| Soft, crumbling or sagging drywall | No | Yes, full panel or return replaced |
| Swollen or blackened wood sill | Rarely | Yes, once the source is fixed |
Behind the drywall, the insulation in the shaft walls may be wet or compressed. Wet insulation loses much of its value and can hold moisture against the framing, so it is worth checking whenever the drywall is opened.
Checking For Mould
Any time water has been getting into the shaft for more than a short period, it is worth checking for mould. Look for dark spots or fuzzy patches on drywall, trim or the underside of the skylight frame, and notice any musty smell in the room or the attic. A handheld moisture tester, which most repair contractors carry, can confirm whether materials are still wet.
Small areas of surface mould on hard surfaces are often manageable, but mould inside wall cavities, on insulation or across larger areas calls for more care. Health Canada publishes guidance on mould in homes, including how the size of the affected area changes what cleanup is appropriate, and it is a sensible reference. If you have health concerns, or the affected area is large, a qualified mould remediation professional is the right call.
The key point is sequence. Cleaning mould without fixing the moisture source means it comes back. Painting over mould seals the problem in rather than solving it.
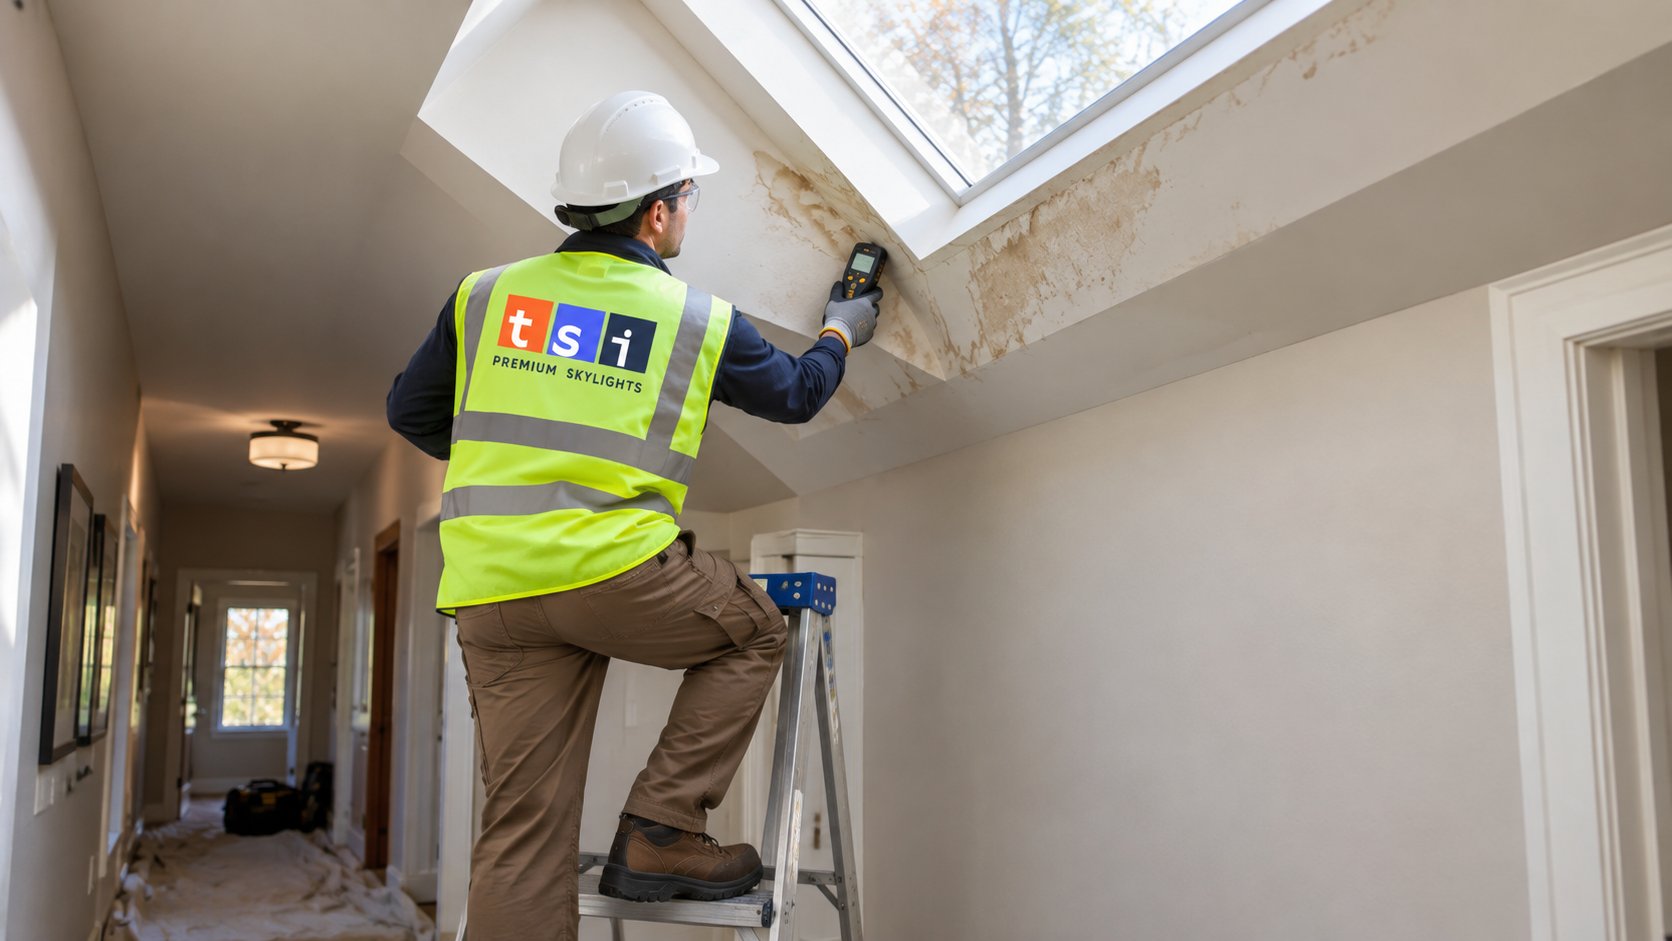
The Right Order For Repairs
The most common mistake with skylight water damage is fixing the ceiling before fixing the source. Fresh paint over a stain looks fine for a few weeks, then the next rain or cold snap brings it back. Here is the order we follow:
- Identify the source. Inspect from the roof and from inside. A water test, where water is run over specific parts of the skylight in turn, can pinpoint flashing or seal leaks.
- Stop the water. Repair or replace flashing, reseal or replace glass, adjust or replace a venting sash, or address condensation through insulation and humidity control. If the unit is old, skylight replacement may be the more lasting fix.
- Dry out. Materials need to dry fully before they are closed up. This can take days or longer depending on how wet they are. Moisture readings confirm it.
- Remove damaged materials. Soft drywall, wet insulation and swollen trim are removed. Mould is addressed at this stage.
- Rebuild the shaft properly. Insulation, a continuous air and vapour barrier and new drywall go in. This is the moment to fix condensation causes too.
- Finish. Joints are taped, stains that remain on sound drywall are sealed with a stain-blocking primer, and the shaft and ceiling are painted.
| Step | Main purpose | What happens if skipped |
|---|---|---|
| Find the source | Target the actual entry point | Repairs miss the cause and the stain returns |
| Stop the water | Protect everything below | New drywall and paint get damaged again |
| Dry out | Prevent trapped moisture | Mould and paint failure behind new finishes |
| Remove damaged materials | Clear out soft drywall and wet insulation | Sagging, odours and hidden mould |
| Rebuild with insulation and air barrier | Reduce condensation risk | Winter drips continue even with no leak |
| Prime and paint | Seal stains and finish cleanly | Stains bleed through ordinary paint |
Condensation Fixes That Actually Work
Condensation accounts for a share of the skylight water damage we see. The fixes are about keeping surfaces warmer and air drier:
- Insulate and air seal the shaft. Cold shaft walls are a common cause, and how to insulate them is a topic of its own that we cover separately.
- Control indoor humidity, especially in bathrooms and kitchens. Run exhaust fans during and after showers and cooking.
- Consider a venting skylight in moist rooms. Opening it briefly after a shower in milder weather lets humid air out at the highest point.
- Upgrade old glazing. Single-glazed or failed double-glazed units have cold inner surfaces. A modern unit with insulated, low-emissivity glass stays warmer on the room side.
- Keep air moving. Heavy blinds or shades left closed on cold nights can trap cold air against the glass and increase condensation.
If condensation is the only problem, no roofing work is needed, which is exactly why getting the diagnosis right saves money.
What You Can Safely Do While You Wait
Between noticing skylight water damage and getting it repaired, a few simple steps limit the harm without putting anyone at risk:
- Catch the water. Put a bucket or towels under active drips and move rugs and furniture away from the area.
- Keep a log. Write down the date, the weather and where the water appeared each time. A week of notes often settles the leak versus condensation question.
- Look in from the attic hatch if there is one. With a flashlight, and without stepping into the attic, look for wet insulation, dark wood or drips. Anything more is done by the installer during the inspection.
- Reduce humidity. Run bathroom and kitchen fans longer and avoid drying laundry indoors, which helps if condensation is part of the problem.
- Close venting units. Make sure any venting skylight is fully closed and its sash is seated evenly.
What we advise against: climbing onto the roof to smear sealant around the skylight. Roof surfaces are slippery, especially with autumn leaves on them, and sealant applied over wet or dirty flashing usually fails quickly while hiding the evidence a technician needs to find the real entry point. If water is coming in heavily, emergency skylight repairs can make the opening safe until a permanent fix.
What To Expect From The Repair
Realistic expectations help avoid disappointment. A properly executed repair should stop the water and leave the shaft and ceiling sound and cleanly finished. Some things are worth knowing in advance:
- Paint matching. Even with the same paint, a patched area can look slightly different from surrounding ceiling paint. Painting the full shaft and sometimes the whole ceiling gives the most even result.
- Old stains. Stains on sound drywall can usually be sealed with stain-blocking primer, but ordinary paint alone rarely hides them.
- Hidden damage. Opening a shaft sometimes reveals more rot or wet insulation than expected. Good contractors explain this possibility before starting.
- Timing. Drying time can stretch the schedule. Rushing to close up wet materials causes problems later.
- Costs. A minor flashing repair and paint touch-up can be modest, while a new skylight with shaft reconstruction runs considerably higher. As a broad estimate, interior shaft repair alone often falls somewhere from a few hundred dollars to around $1,500, varying widely with size and damage. A site visit is needed for any real figure.
If you are dealing with insurance, keep your dated photos and any written findings. Coverage depends entirely on your policy, so speak to your insurer directly about what applies.
Autumn is the right time to act. Leaks and condensation both get worse as the weather cools, and a repair done now is tested by the freeze-thaw season rather than surprised by it. We handle skylight leak investigations and repairs across the GTA, including skylight installation, replacement and repair across York Region.
Skylight Water Damage FAQ
How can I tell a leak from condensation?
Can I just paint over skylight water damage?
Is mould likely after a skylight leak?
Does skylight water damage mean I need a new skylight?
Why does water appear far from the skylight?
How long does the repair take?
Get Help With Skylight Water Damage
If you have stains, drips or peeling paint around a skylight, the fastest route to a lasting repair is a proper diagnosis of the source. Toronto Skylight Installers will inspect from the roof and the room, identify whether the problem is flashing, seals or condensation, and put the repairs in the right order.
Call us today at (416) 365-7557 or request a free estimate.
Serving homeowners in York Region and across the wider GTA with skylight installation, replacement and repair.